1. Get on board the Livebase platform #
First, you’ll have to first create an account and setup the modeling environment on a Cloudlet. The next steps will guide you through the account activation process.
1.1 Create a free evaluation account #
Go to the Request a free evaluation account
page on our website (under the Dev Resources menu). The form shown on the right will appear in your browser. Fill in the form and press the Send request button.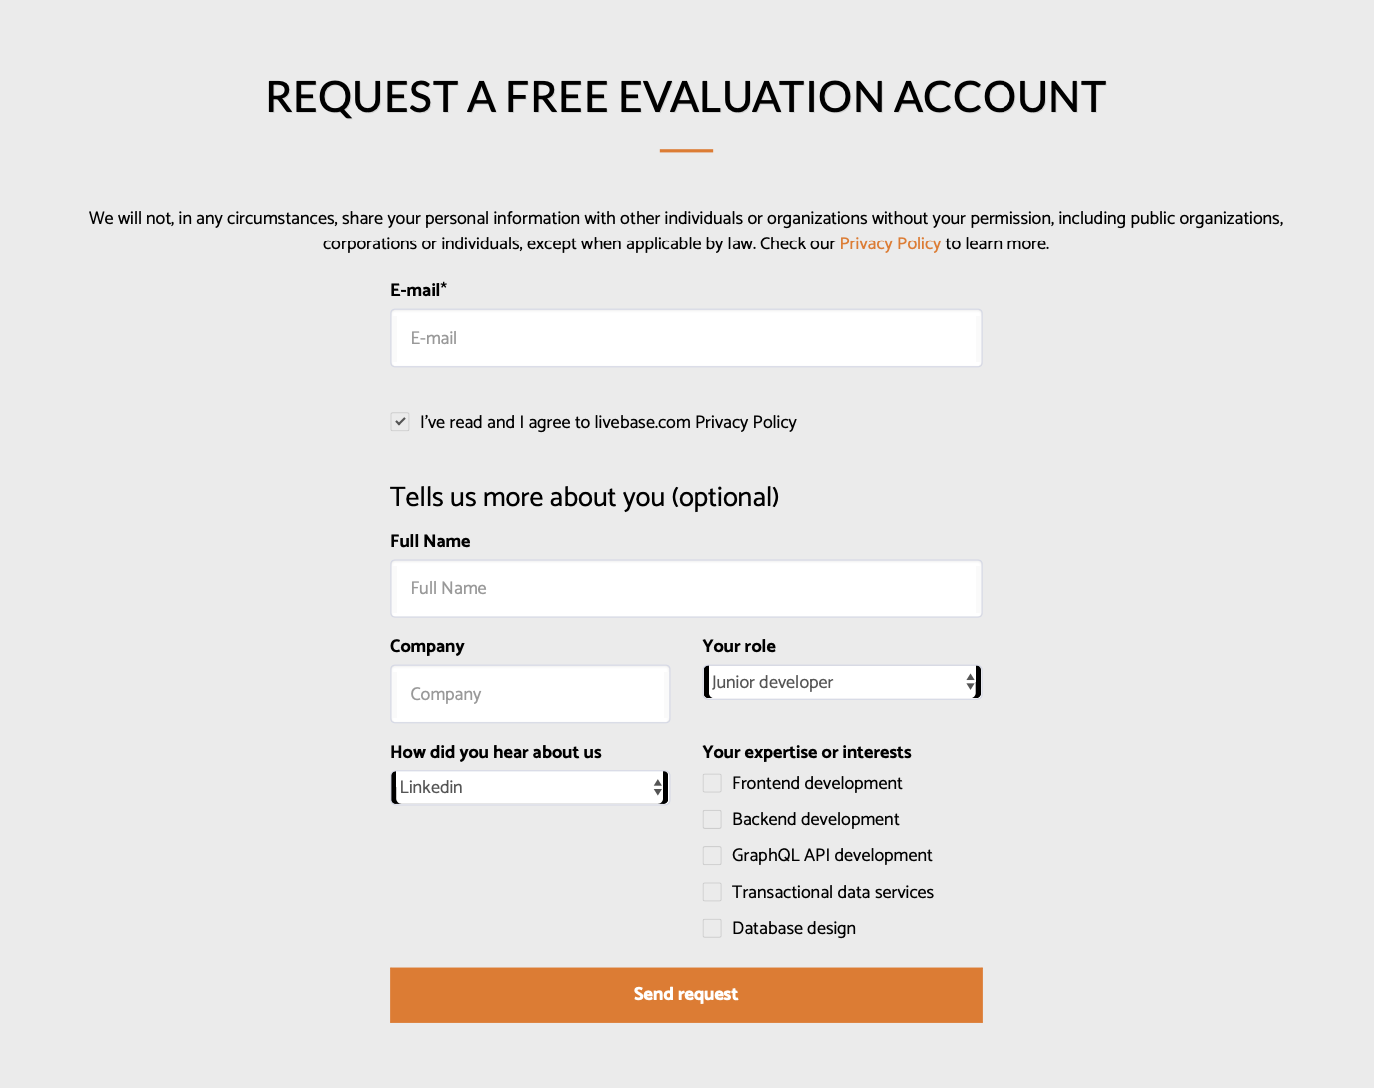
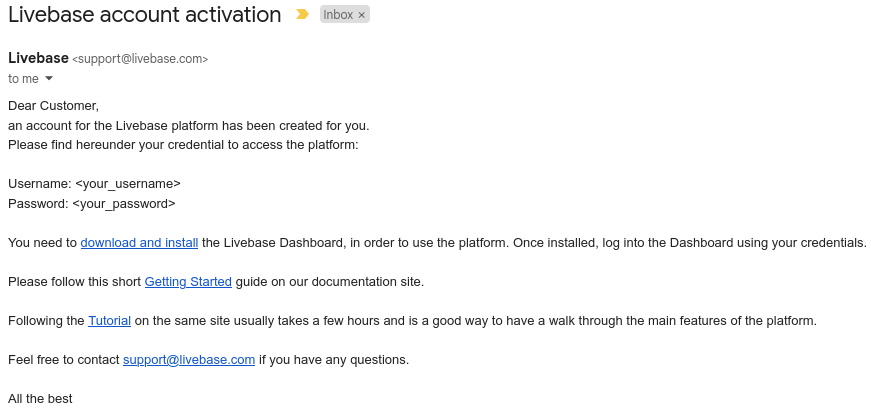
You will receive an email from Livebase support, similar to the one shown here, informing you that your account has been created. This email will contain instructions on how to start using the Livebase platform.
1.2 Install the Dashboard #
To install the Dashboard please follow the instructions on this page.
1.3 Log into the Dashboard #
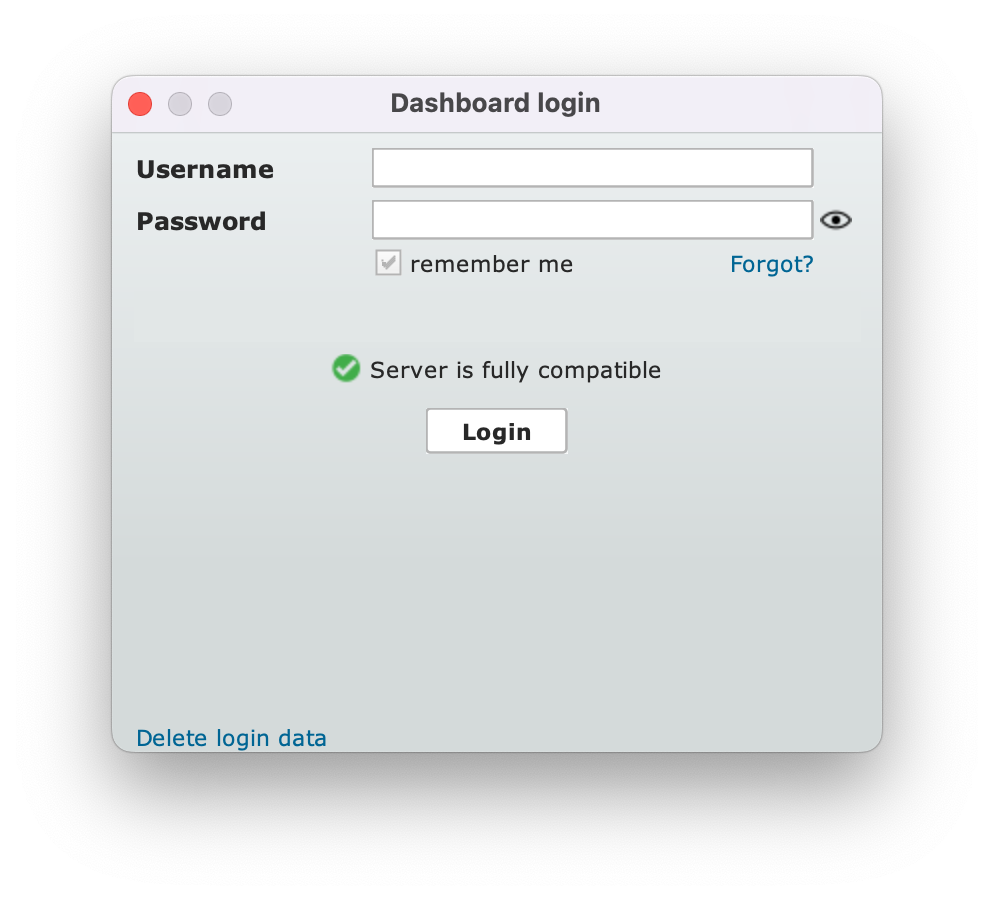
Launch the Dashboard and then log in using the credentials you received previously by email.
The Dashboard is a desktop client connected to the Livebase Cloud Services, providing a user interface to control and operate all other components of the Livebase platform. This light-weight control panel allows developers to create and manage their Cloudlets across their entire lifecycle (creation, start/stop and deletion).
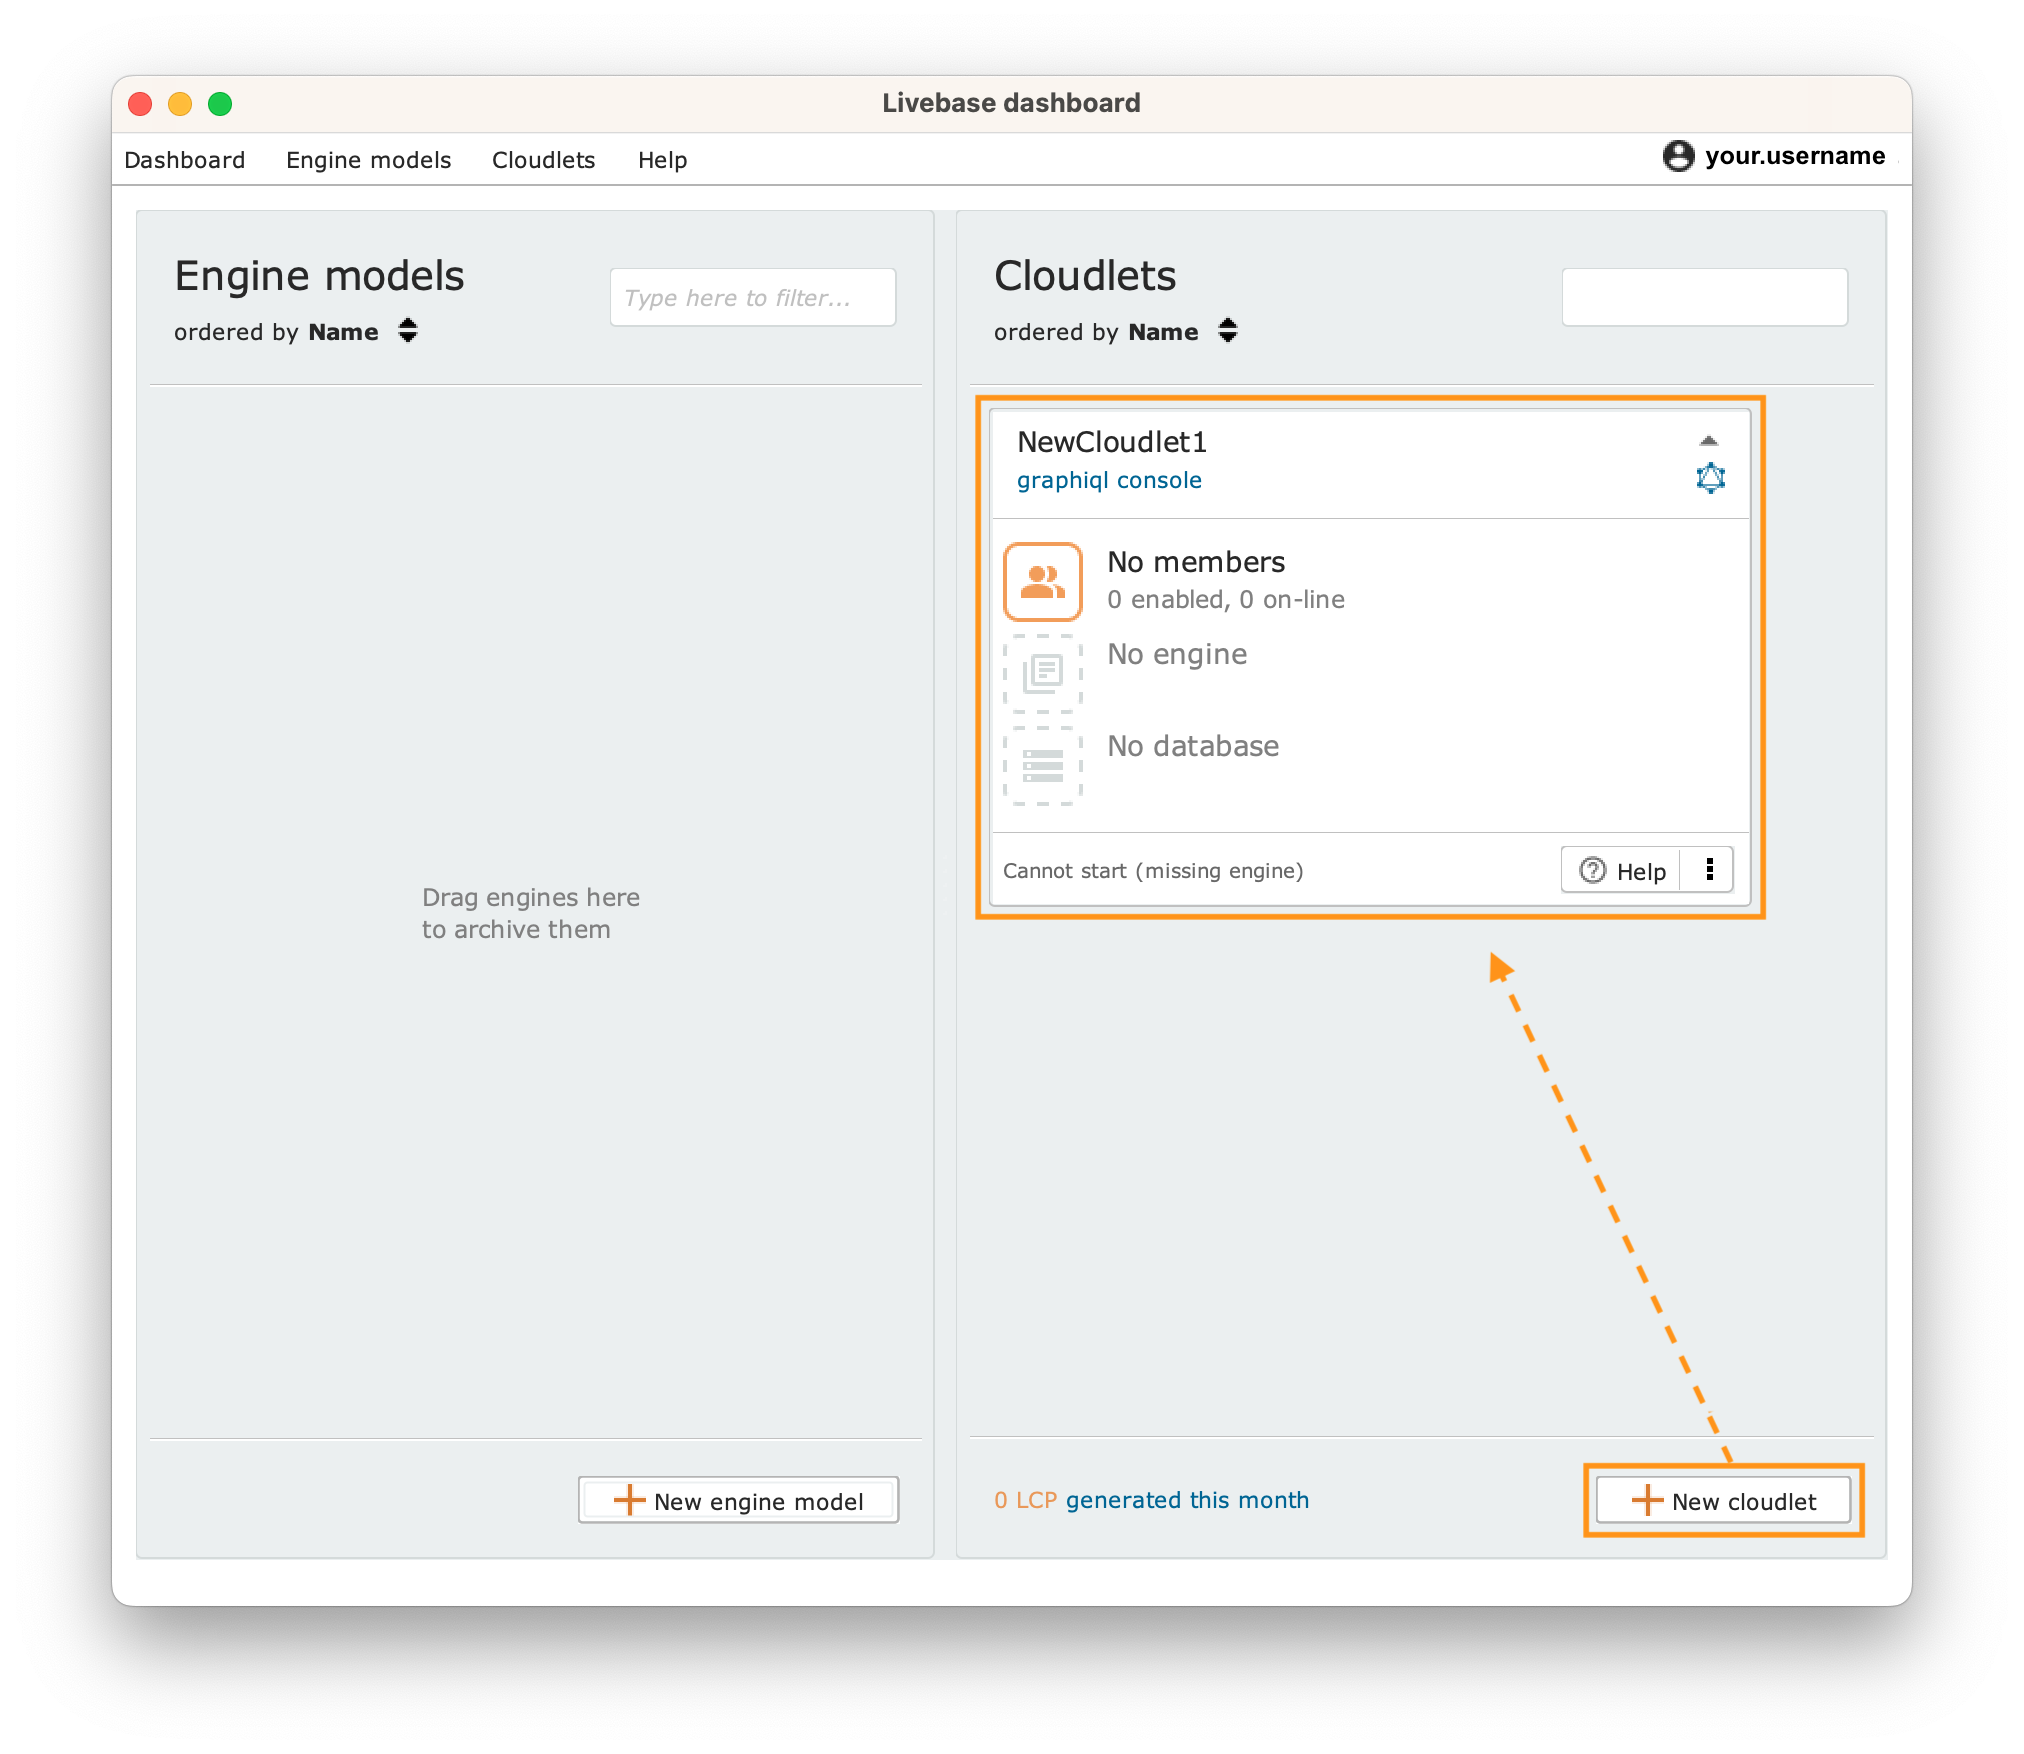
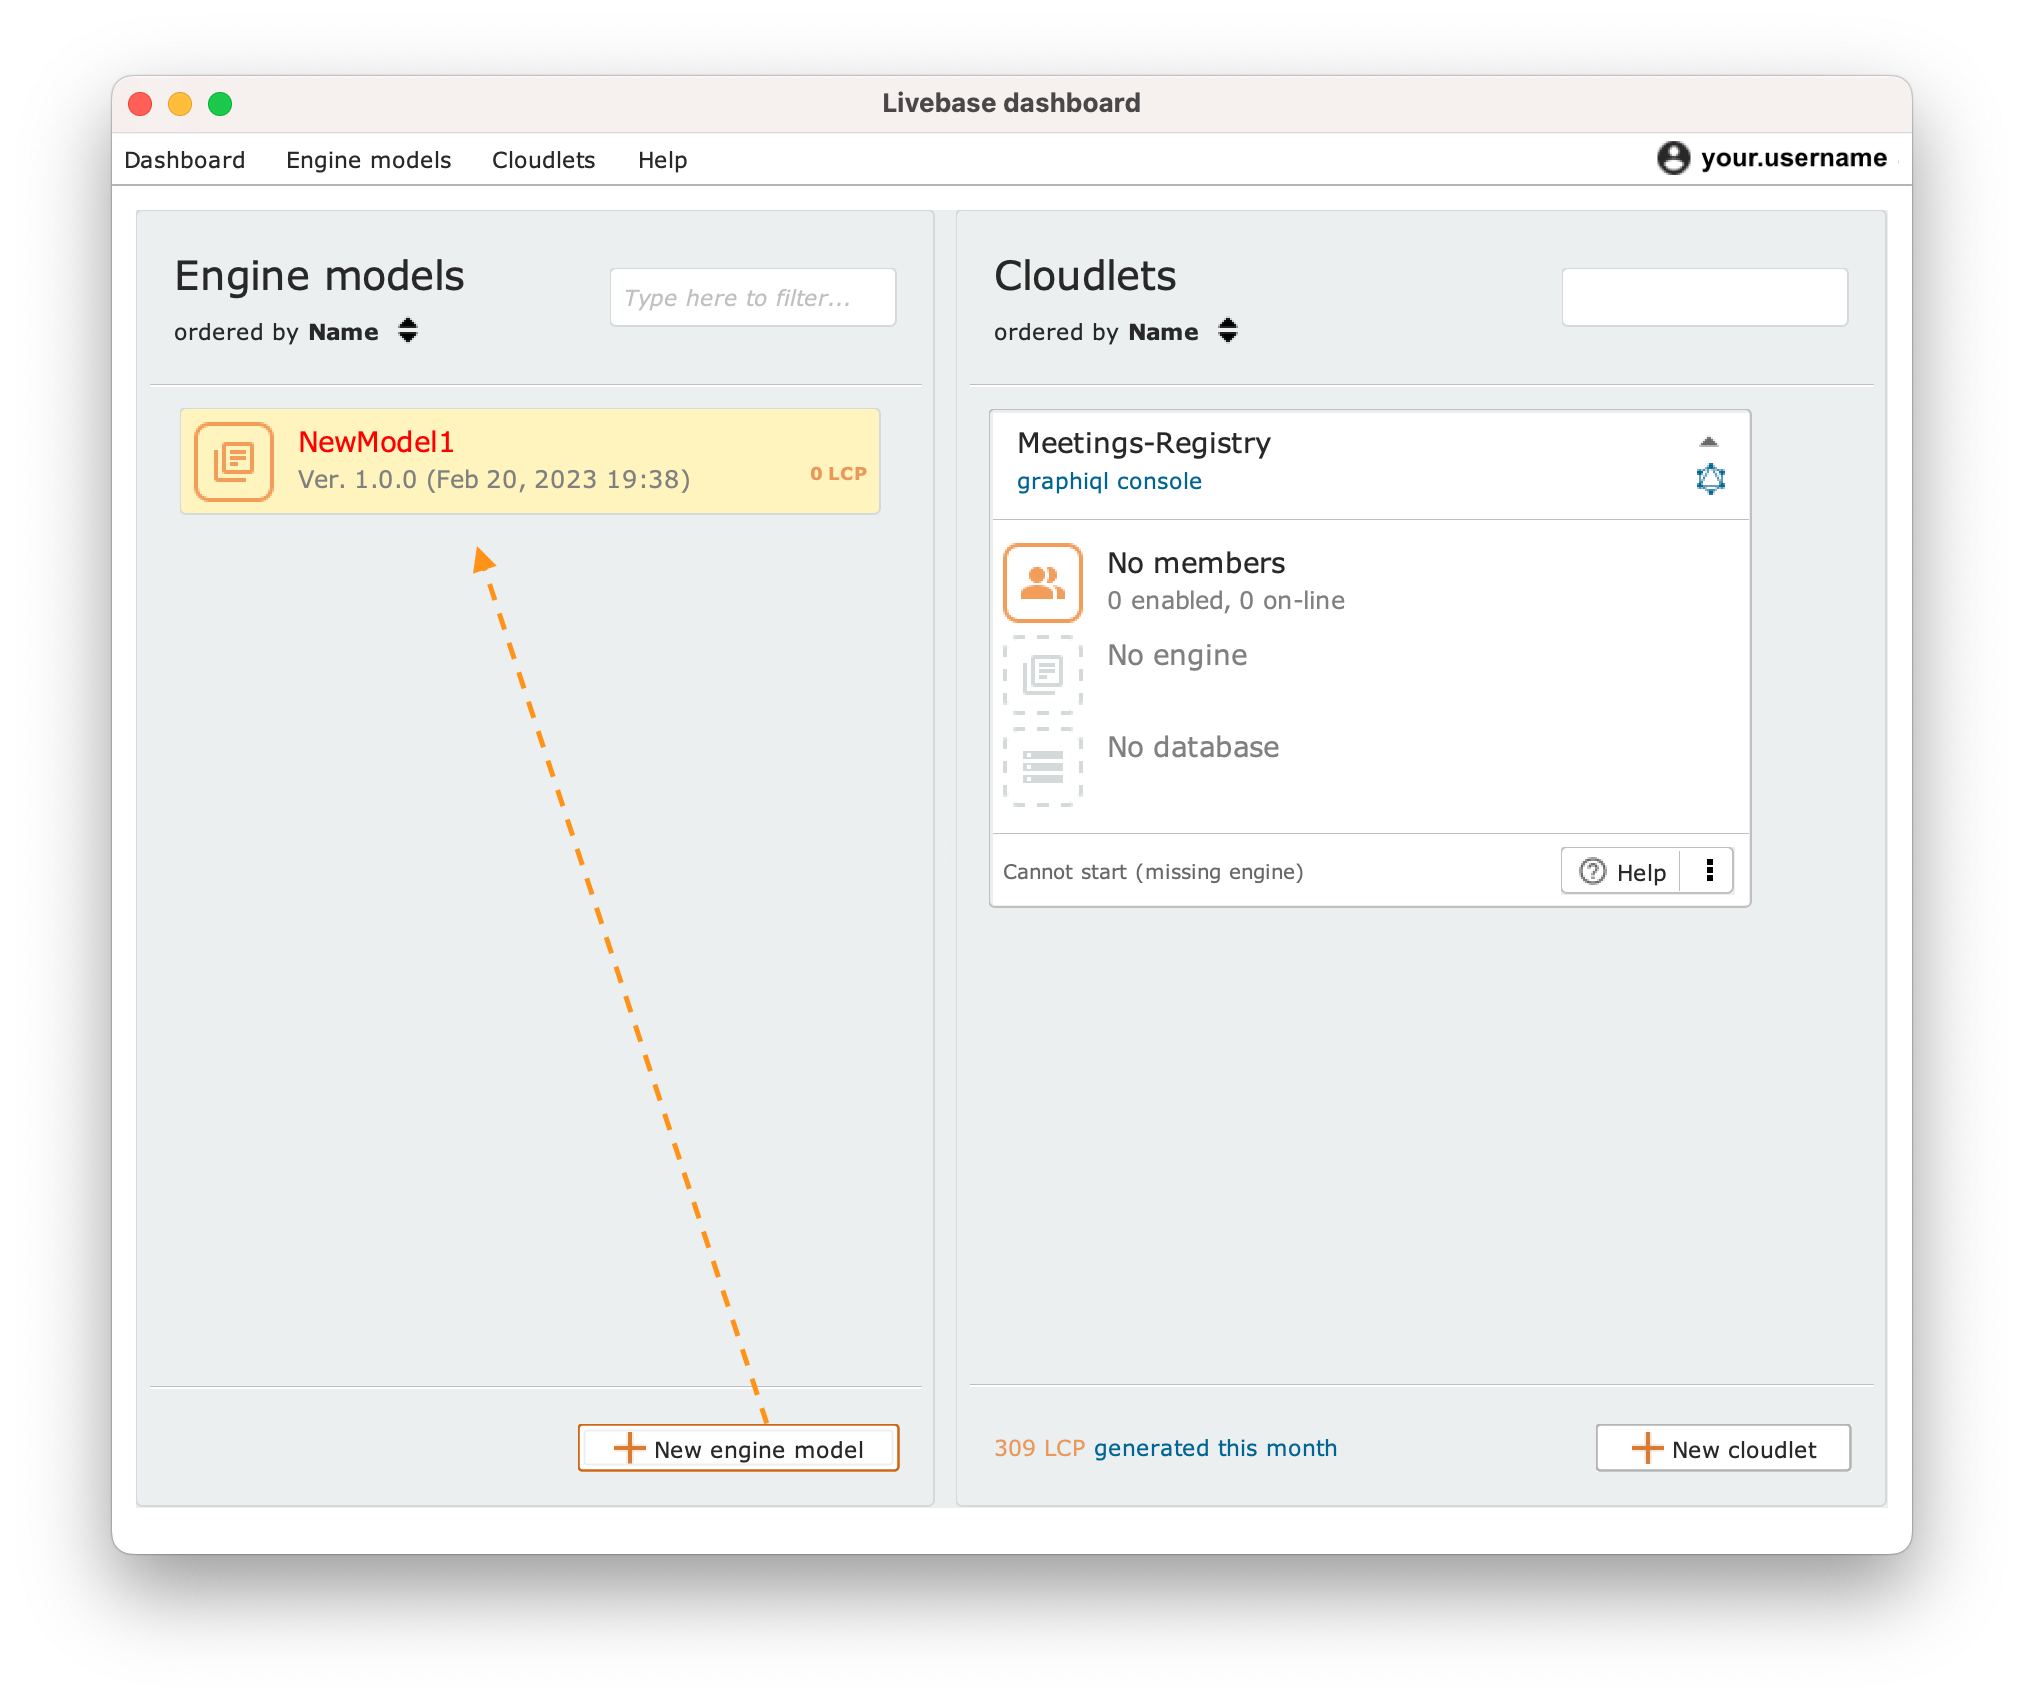
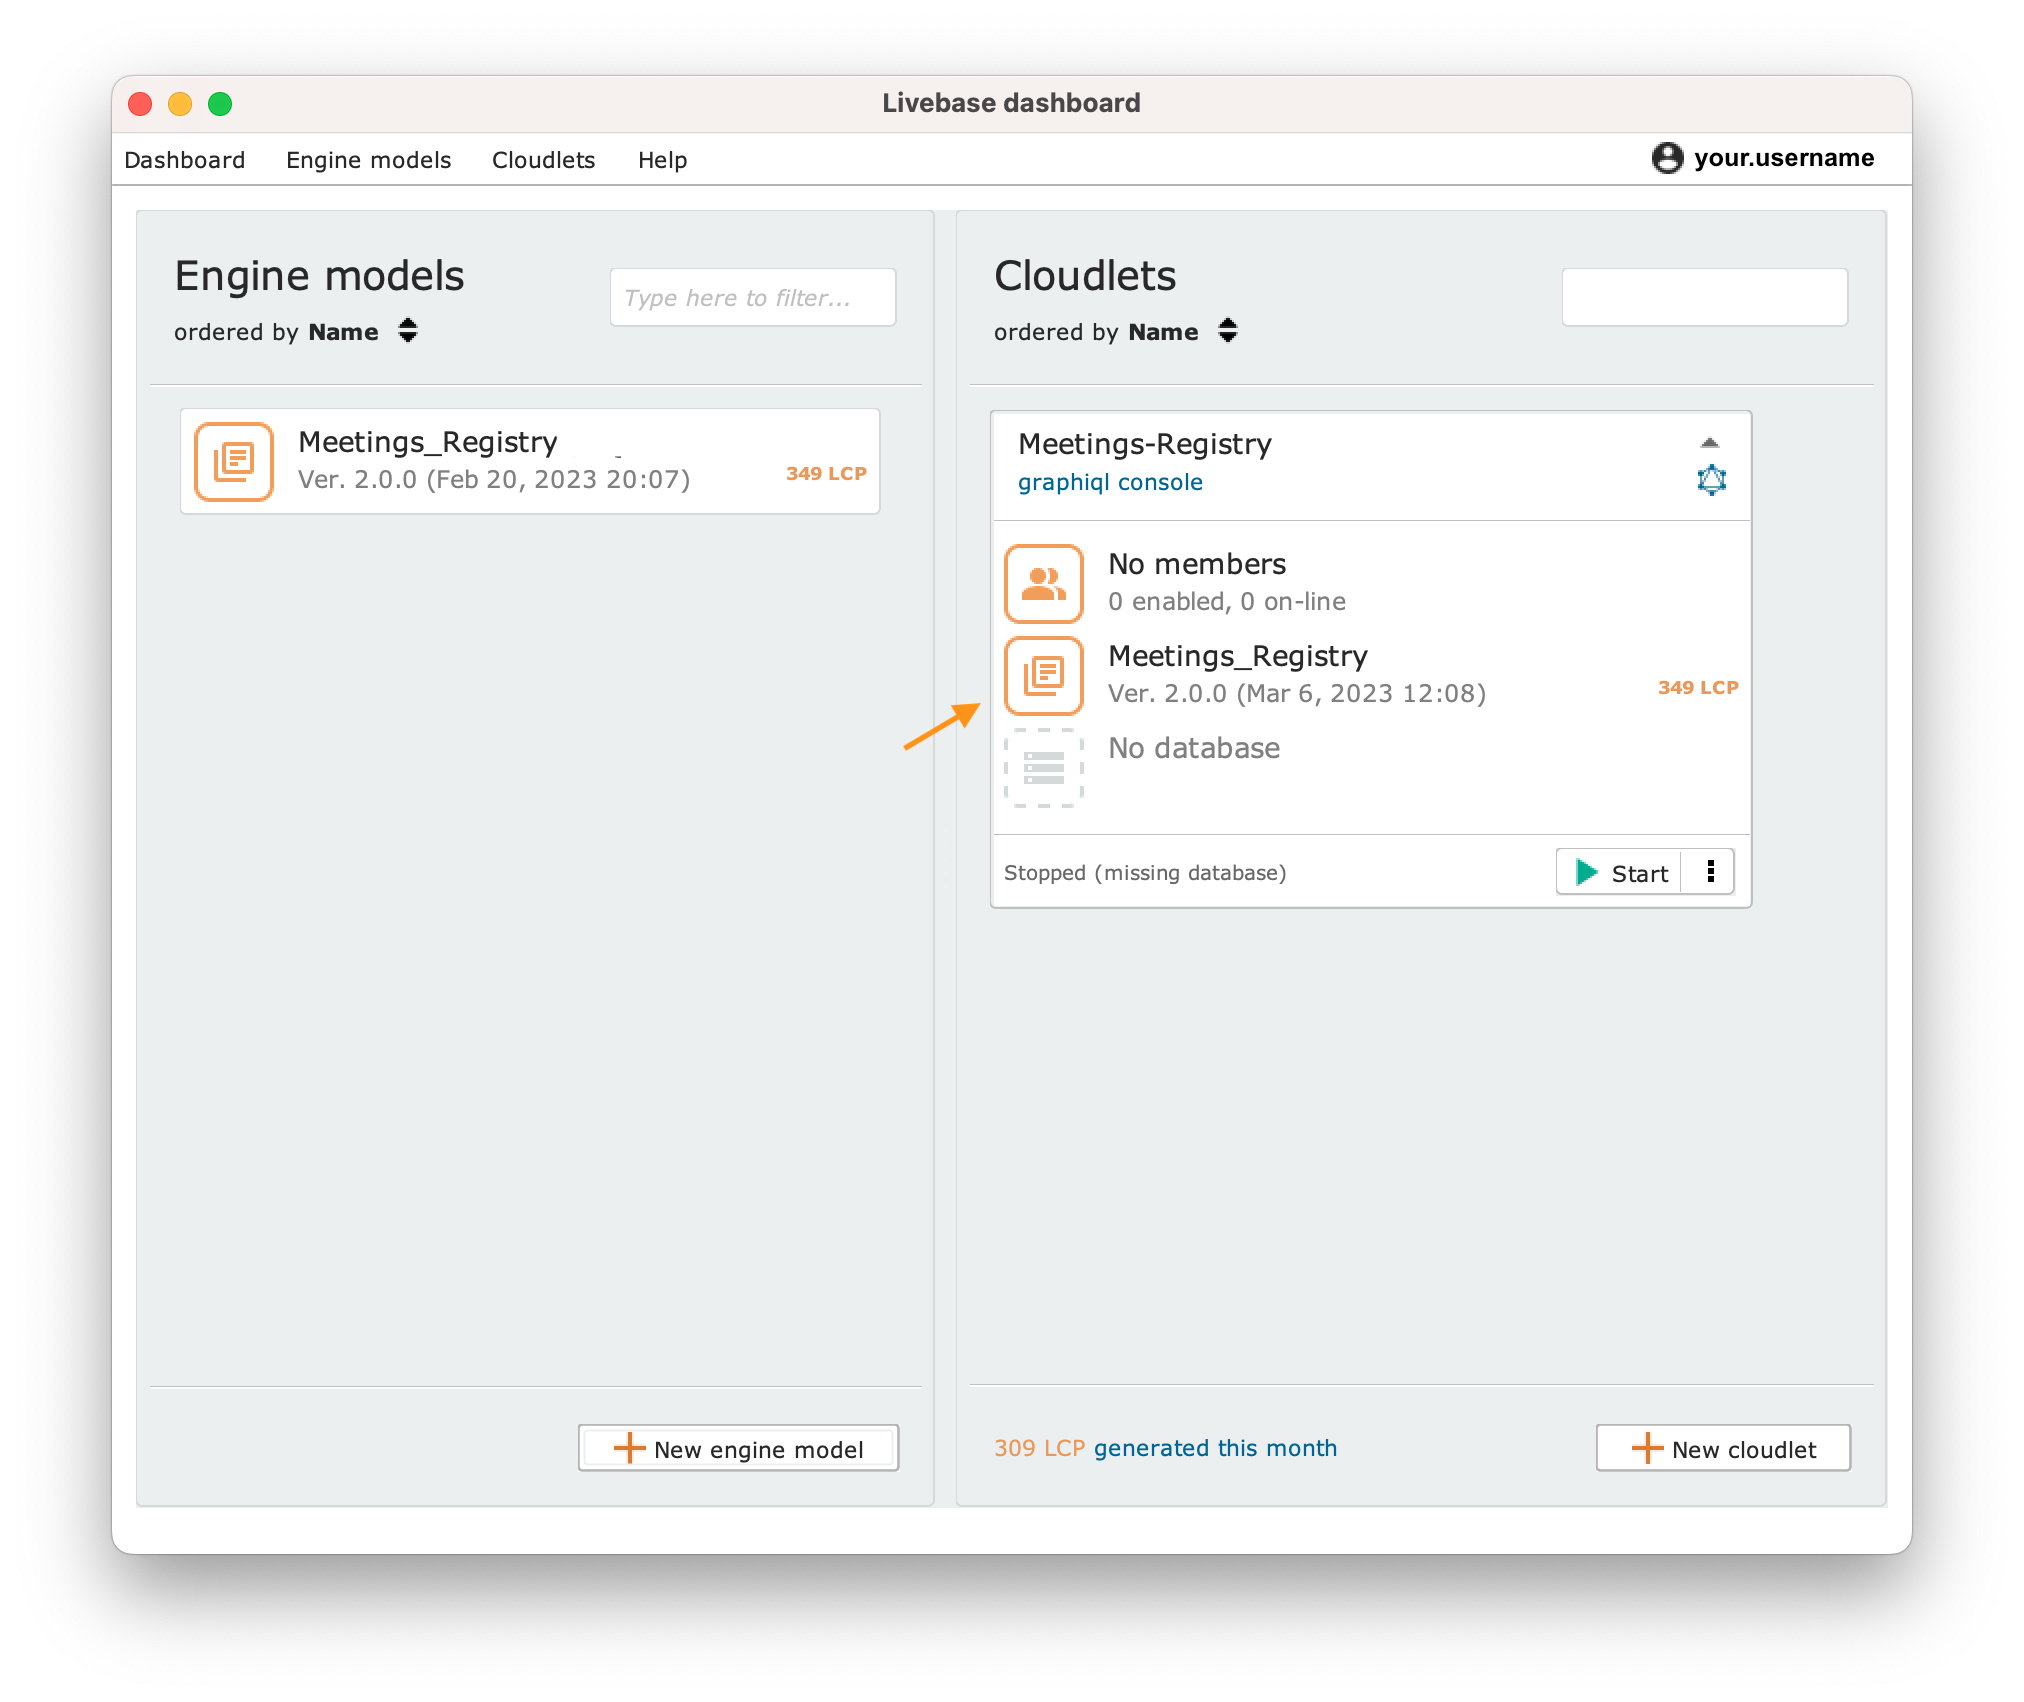
Once logged in, the Dashboard appears as shown:
the Engine models tab (on the left) contains a versioned repository that you can use to archive, retrieve and reuse your engine models.
the Cloudlets tab (on the right) allows you to manage all your Cloudlets. The tab contains a control panel for each Cloudlet.

2. Generate you first application with Livebase #
2.1 Create a Cloudlet #
Cloudlets are headless server components providing advanced (business-level) transactional data services via a secure GraphQL API. Cloudlets are generated and deployed by Livebase starting from high-level conceptual models (engine models) without coding.
To create your first Cloudlet, click on the + New cloudlet button at the bottom right of the Cloudlets tab. A panel will then appear in the Cloudlets section of the Dashboard, allowing you to manage the Cloudlet you’ve just created.
A Cloudlet panel is divided into three sections:
the top section displays the name and the URL address of the Cloudlet;
the middle section displays three icons that provide information and access to the key components of the Cloudlet, namely the list of its members (i.e. the users allowed to invoke the Cloudlet API), the engine and the database.
the bottom section displays the status of the Cloudlet (e.g. Running or Stopped). At the moment, you cannot start your Cloudlet because it has no engine yet, and therefore the Cloudlet status is Cannot start (missing engine). By clicking on the icon, a drop-down menu appears, giving you access to the Cloudlet settings and commands.
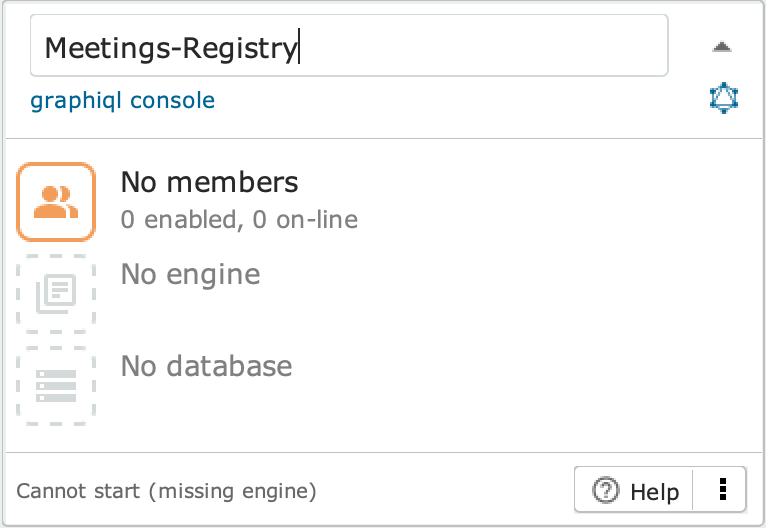
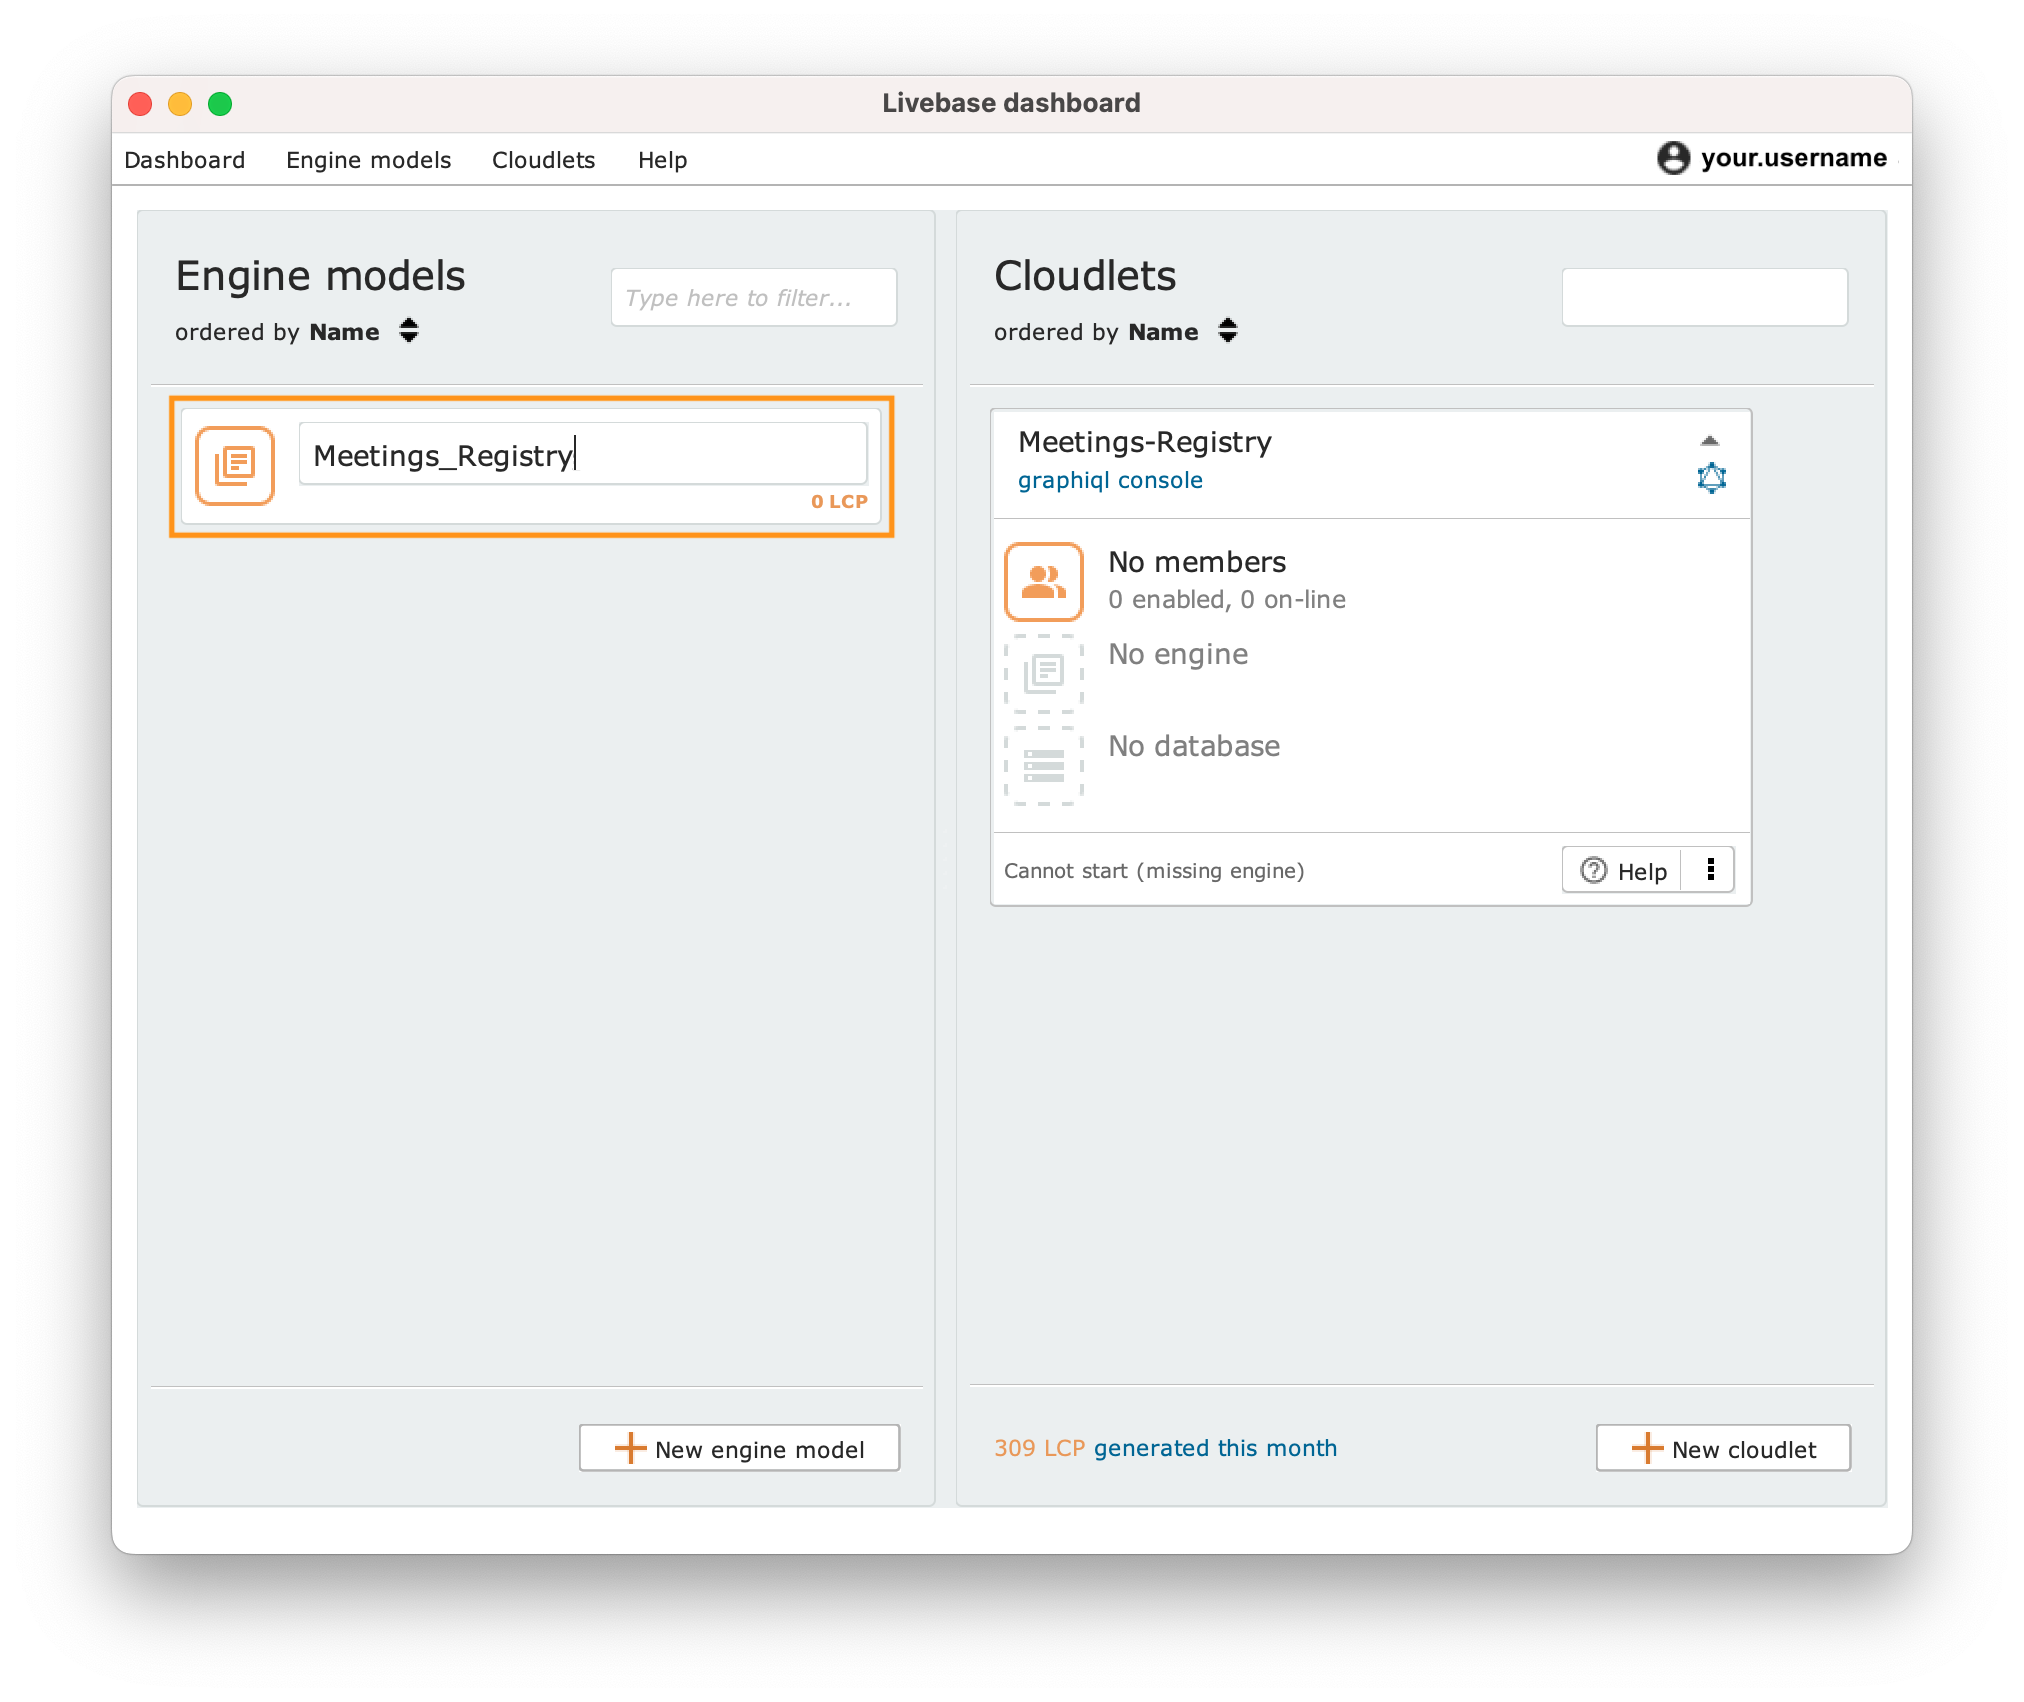
Rename the Cloudlet as Meetings-Registry by double-clicking on its name. You can also click on the menu icon and select the Rename command.
2.2 Jump-start the Cloudlet configuration with an engine model provided by us #
Press the + New engine model button in the bottom right corner of the Engine models tab to create a new (empty) engine model.
Open the newly created engine model by clicking on its icon: the Designer (the modeling environment of the Livebase platform) will pop up in a dedicated window, showing an empty canvas.
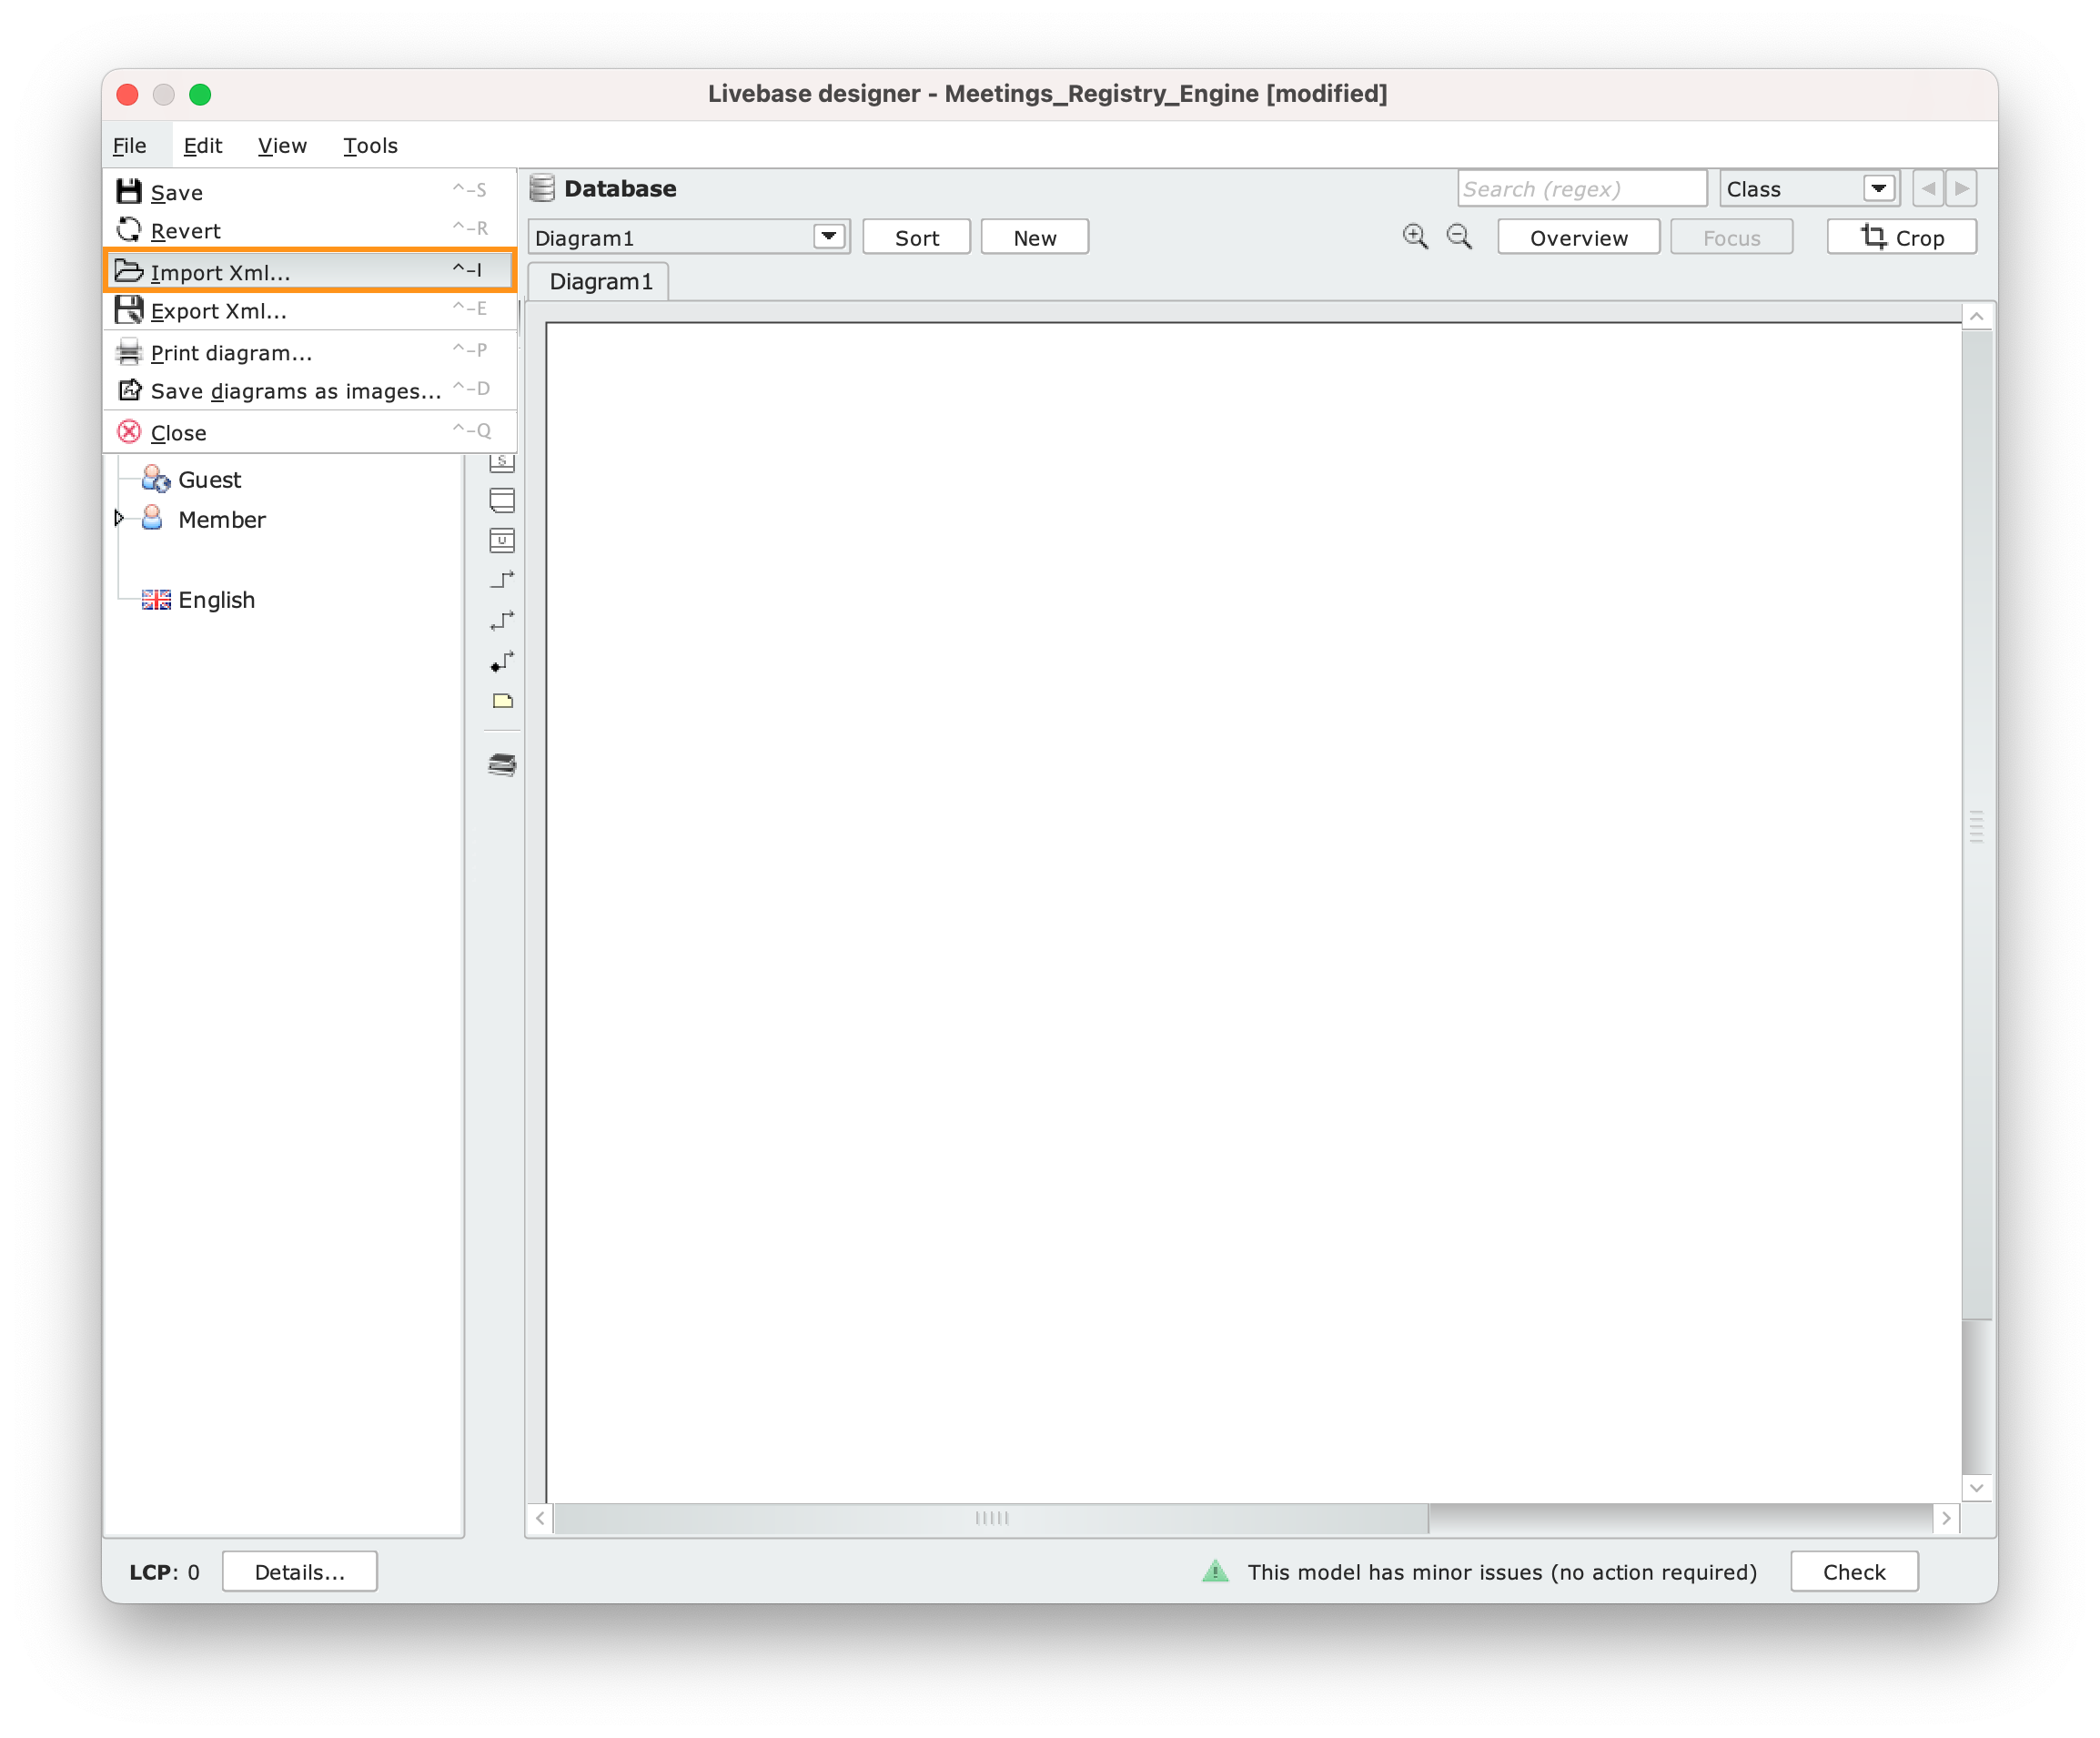
At this point, you would be normally required to draw you engine model. For the sake of this guide, however, you can download a preconfigured
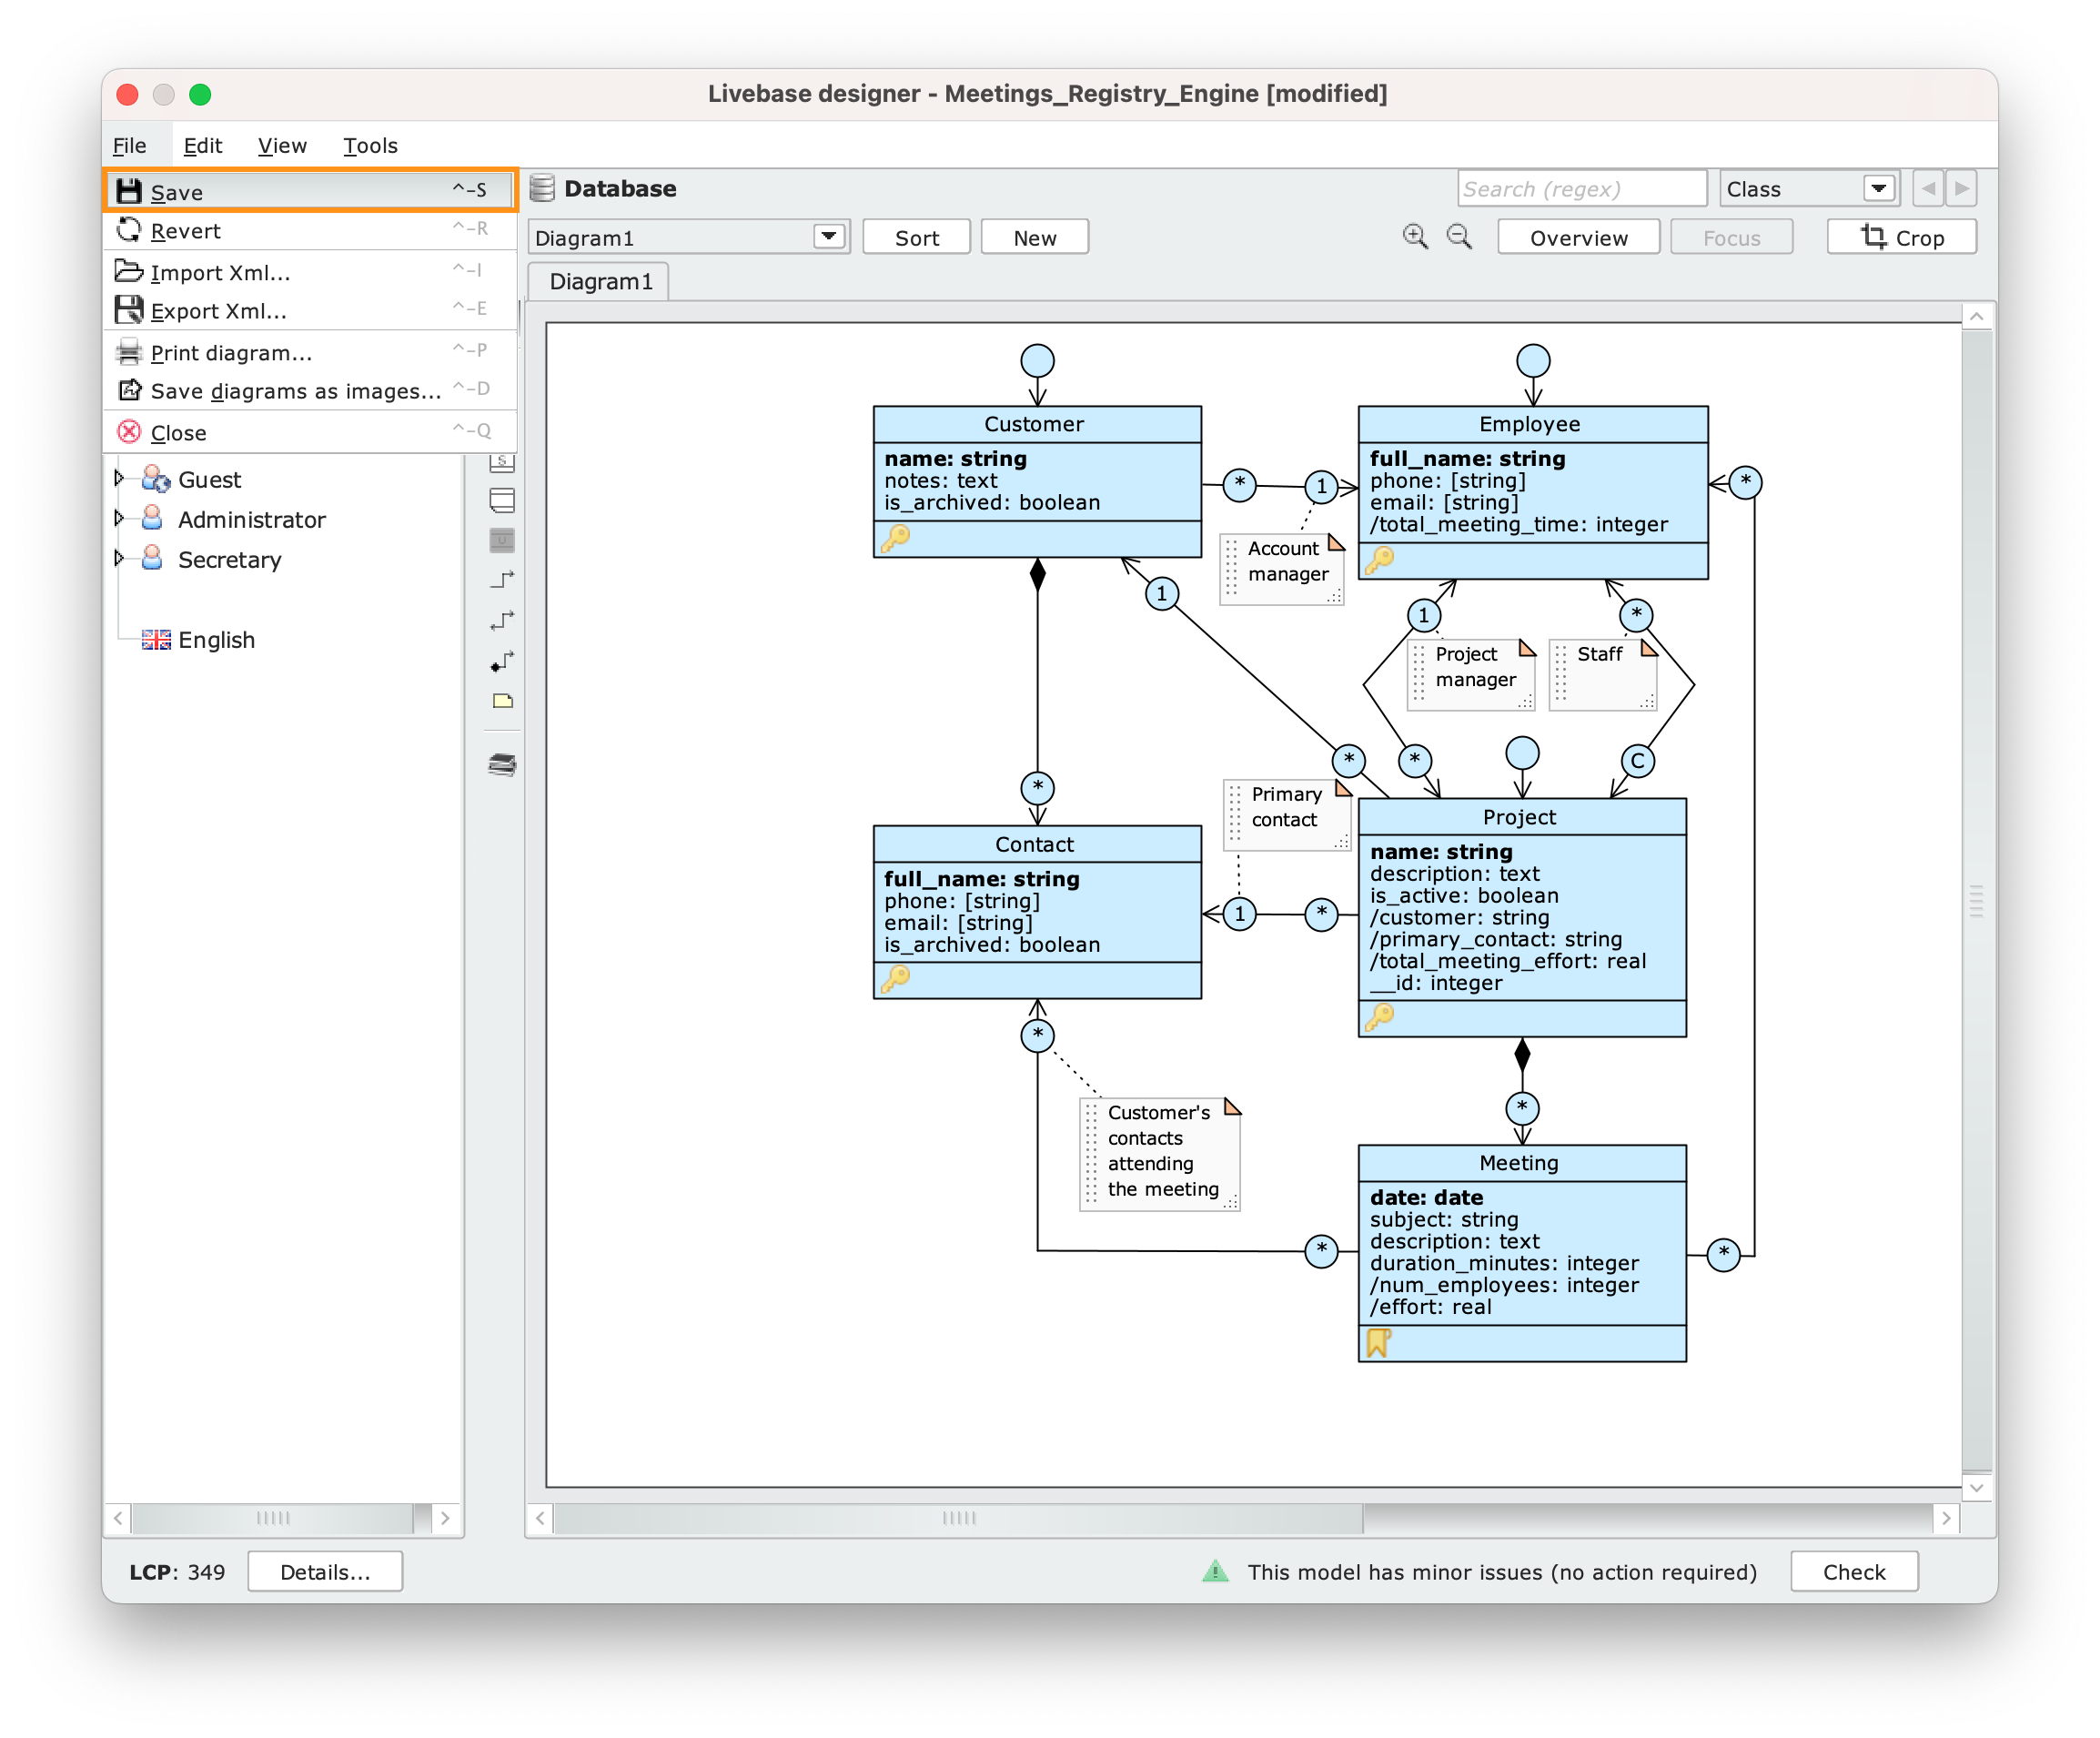
engine model (Meetings_Registry.xml) and import it into the Designer using the Import XML... command under the File menu.
Save your engine model (now version number 2.0.0) and close the Designer.
Rename the engine model as Meetings_Registry by double-clicking on its name.
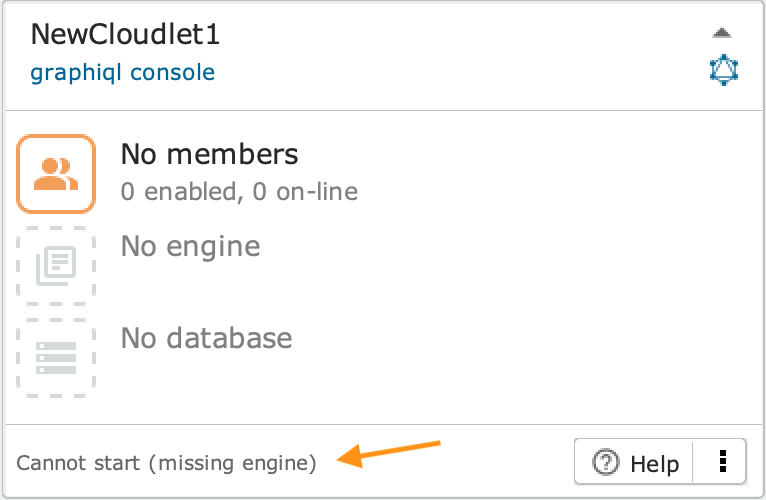
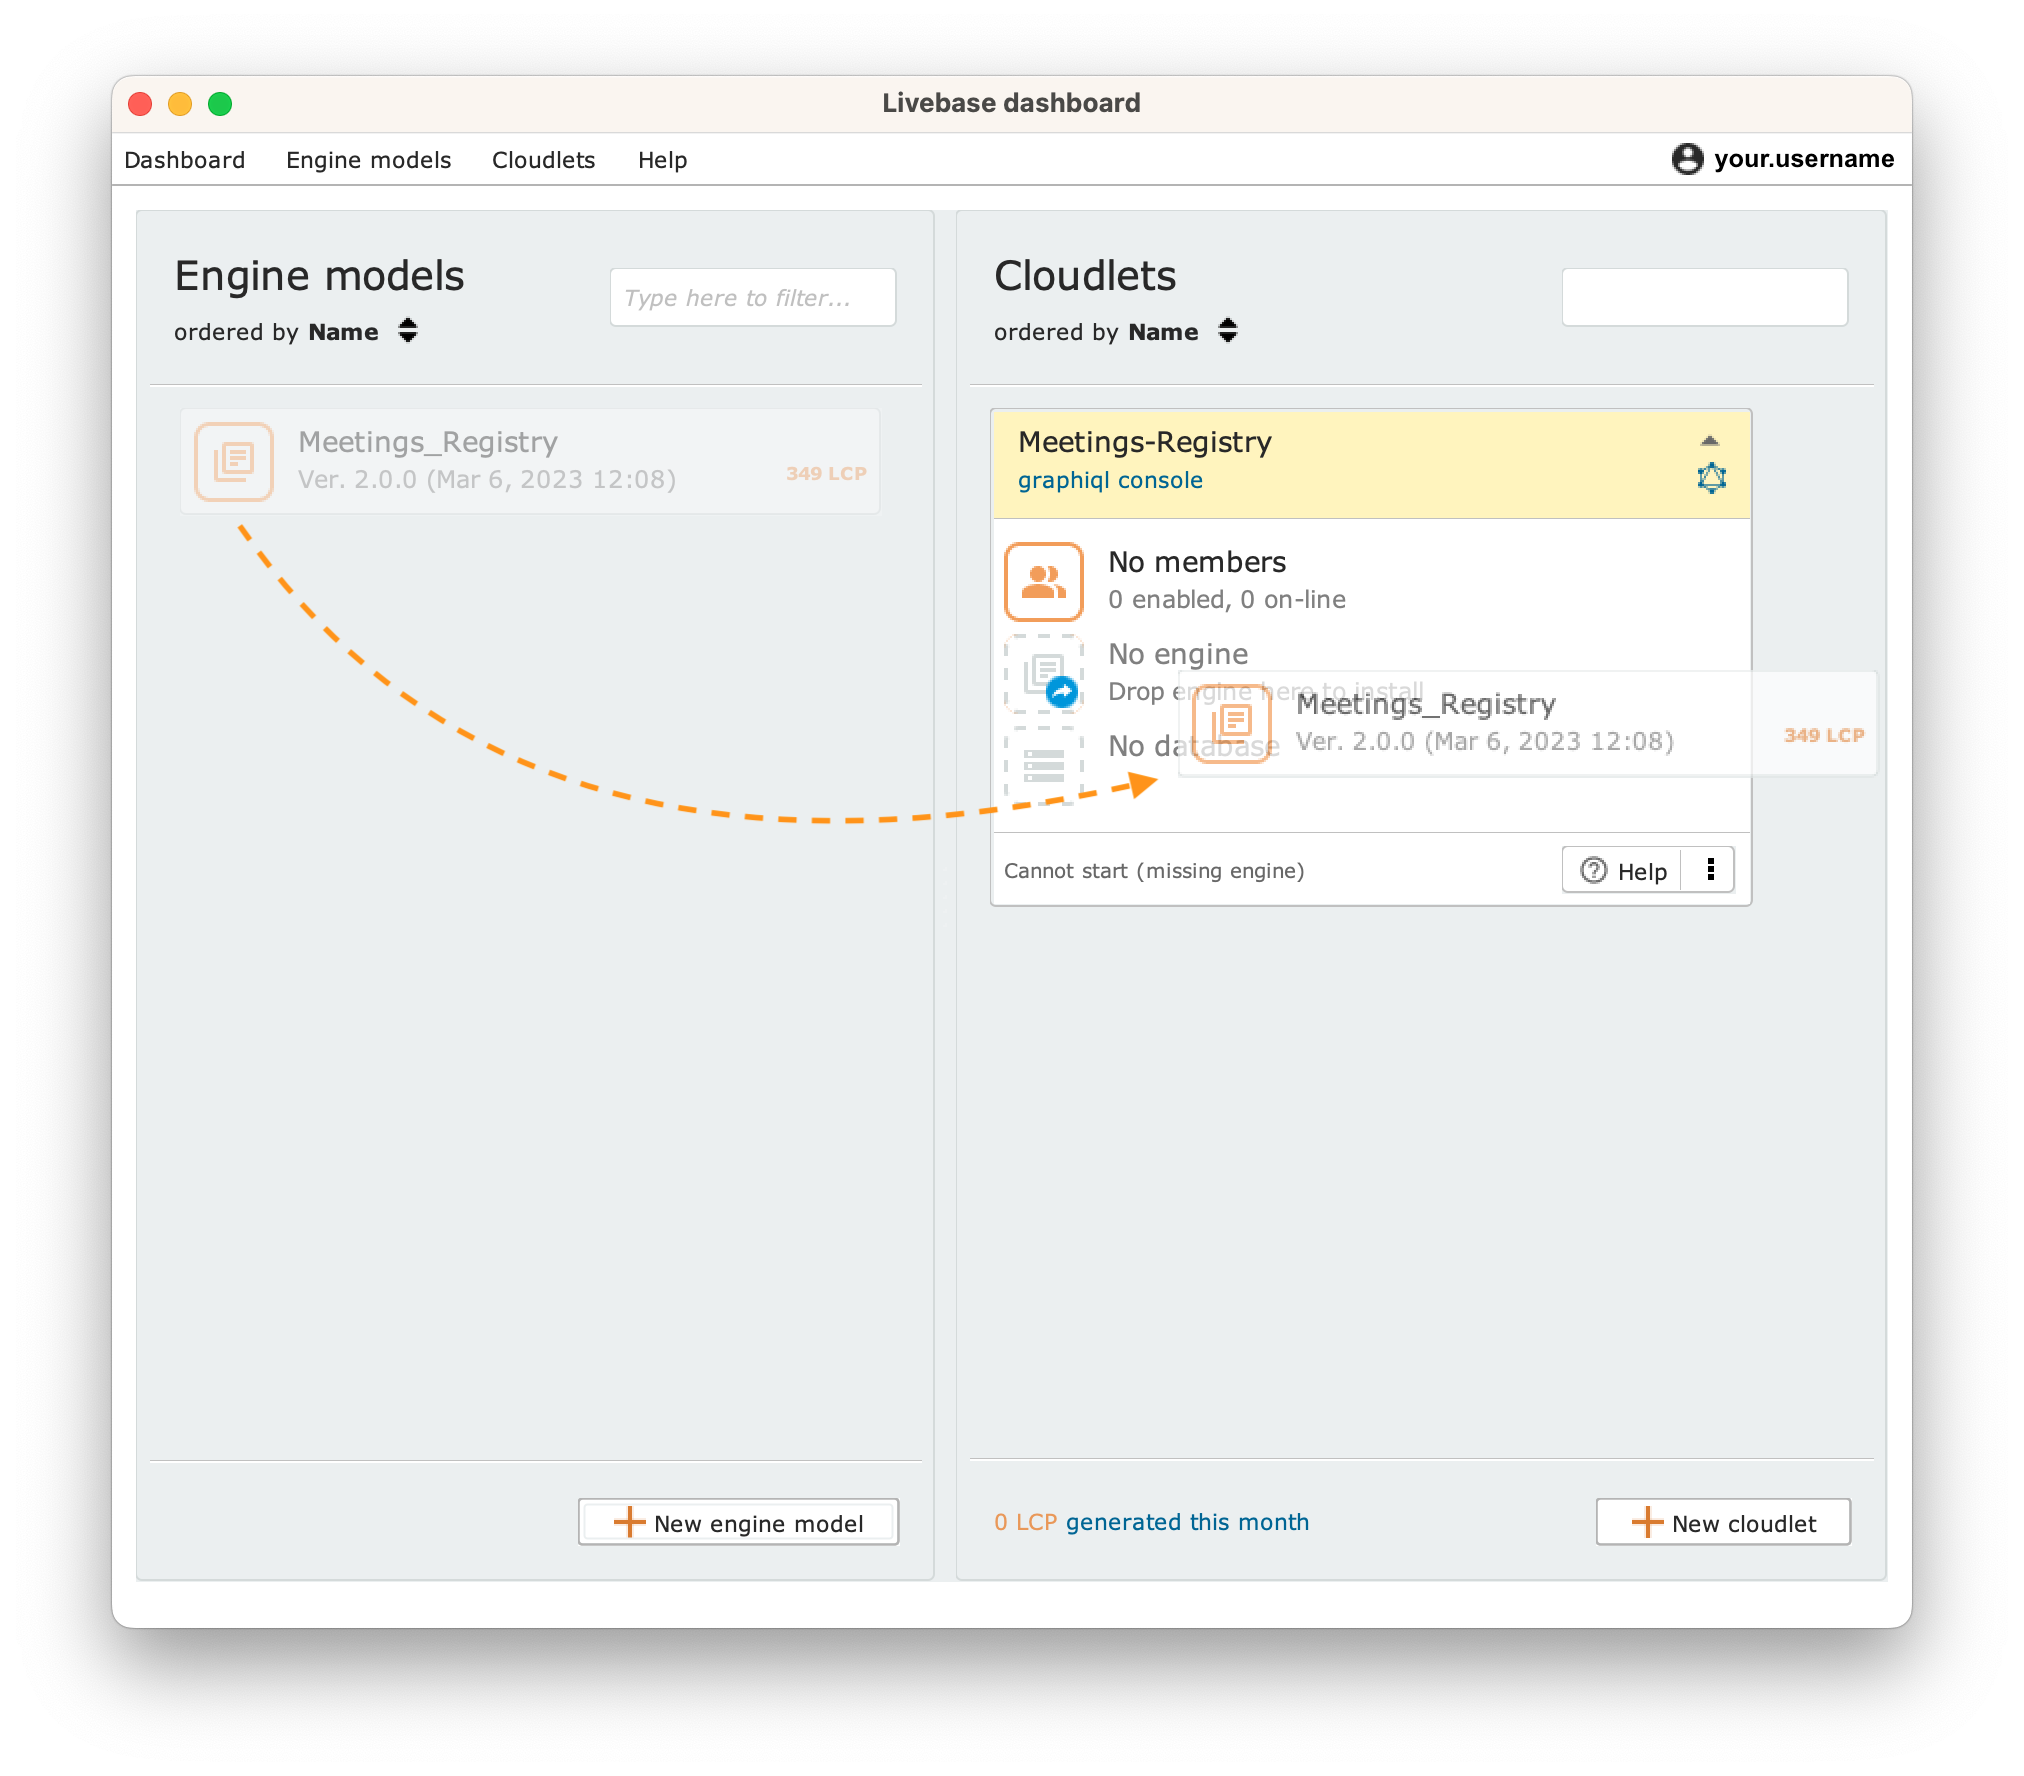
It’s now time to turn the engine model you’ve just stored into an actual engine installed into the Cloudlet. This can be easily be achieved by dragging the engine model icon from the Engine models tab onto the Cloudlet panel; the header of the Cloudlet panel will light up (as shown in the image beside) to notify that you’re allowed to drop the icon.
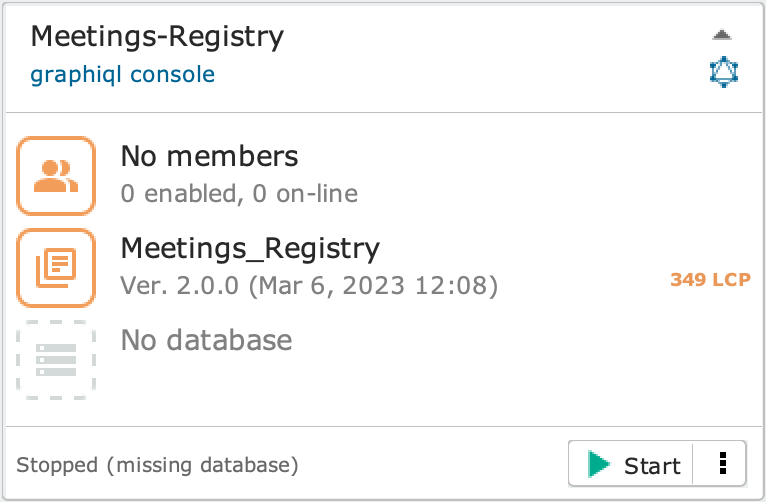
The Cloudlet panel with the engine installed will look as shown in the image beside.
The Cloudlet is now ready to start although a database is still missing (as shown by the status line at the bottom of the Cloudlet panel); in fact, an empty database is created automatically the first time a Cloudlet is started.
Before starting the Cloudlet, however, please go through the following section to take a closer look at the engine you’ve just installed.
2.3 Take a closer look at the engine just installed on your Cloudlet #
Understanding the basics of the engine you’ve just installed on your Cloudlet is essential to properly invoke its GraphQL API.
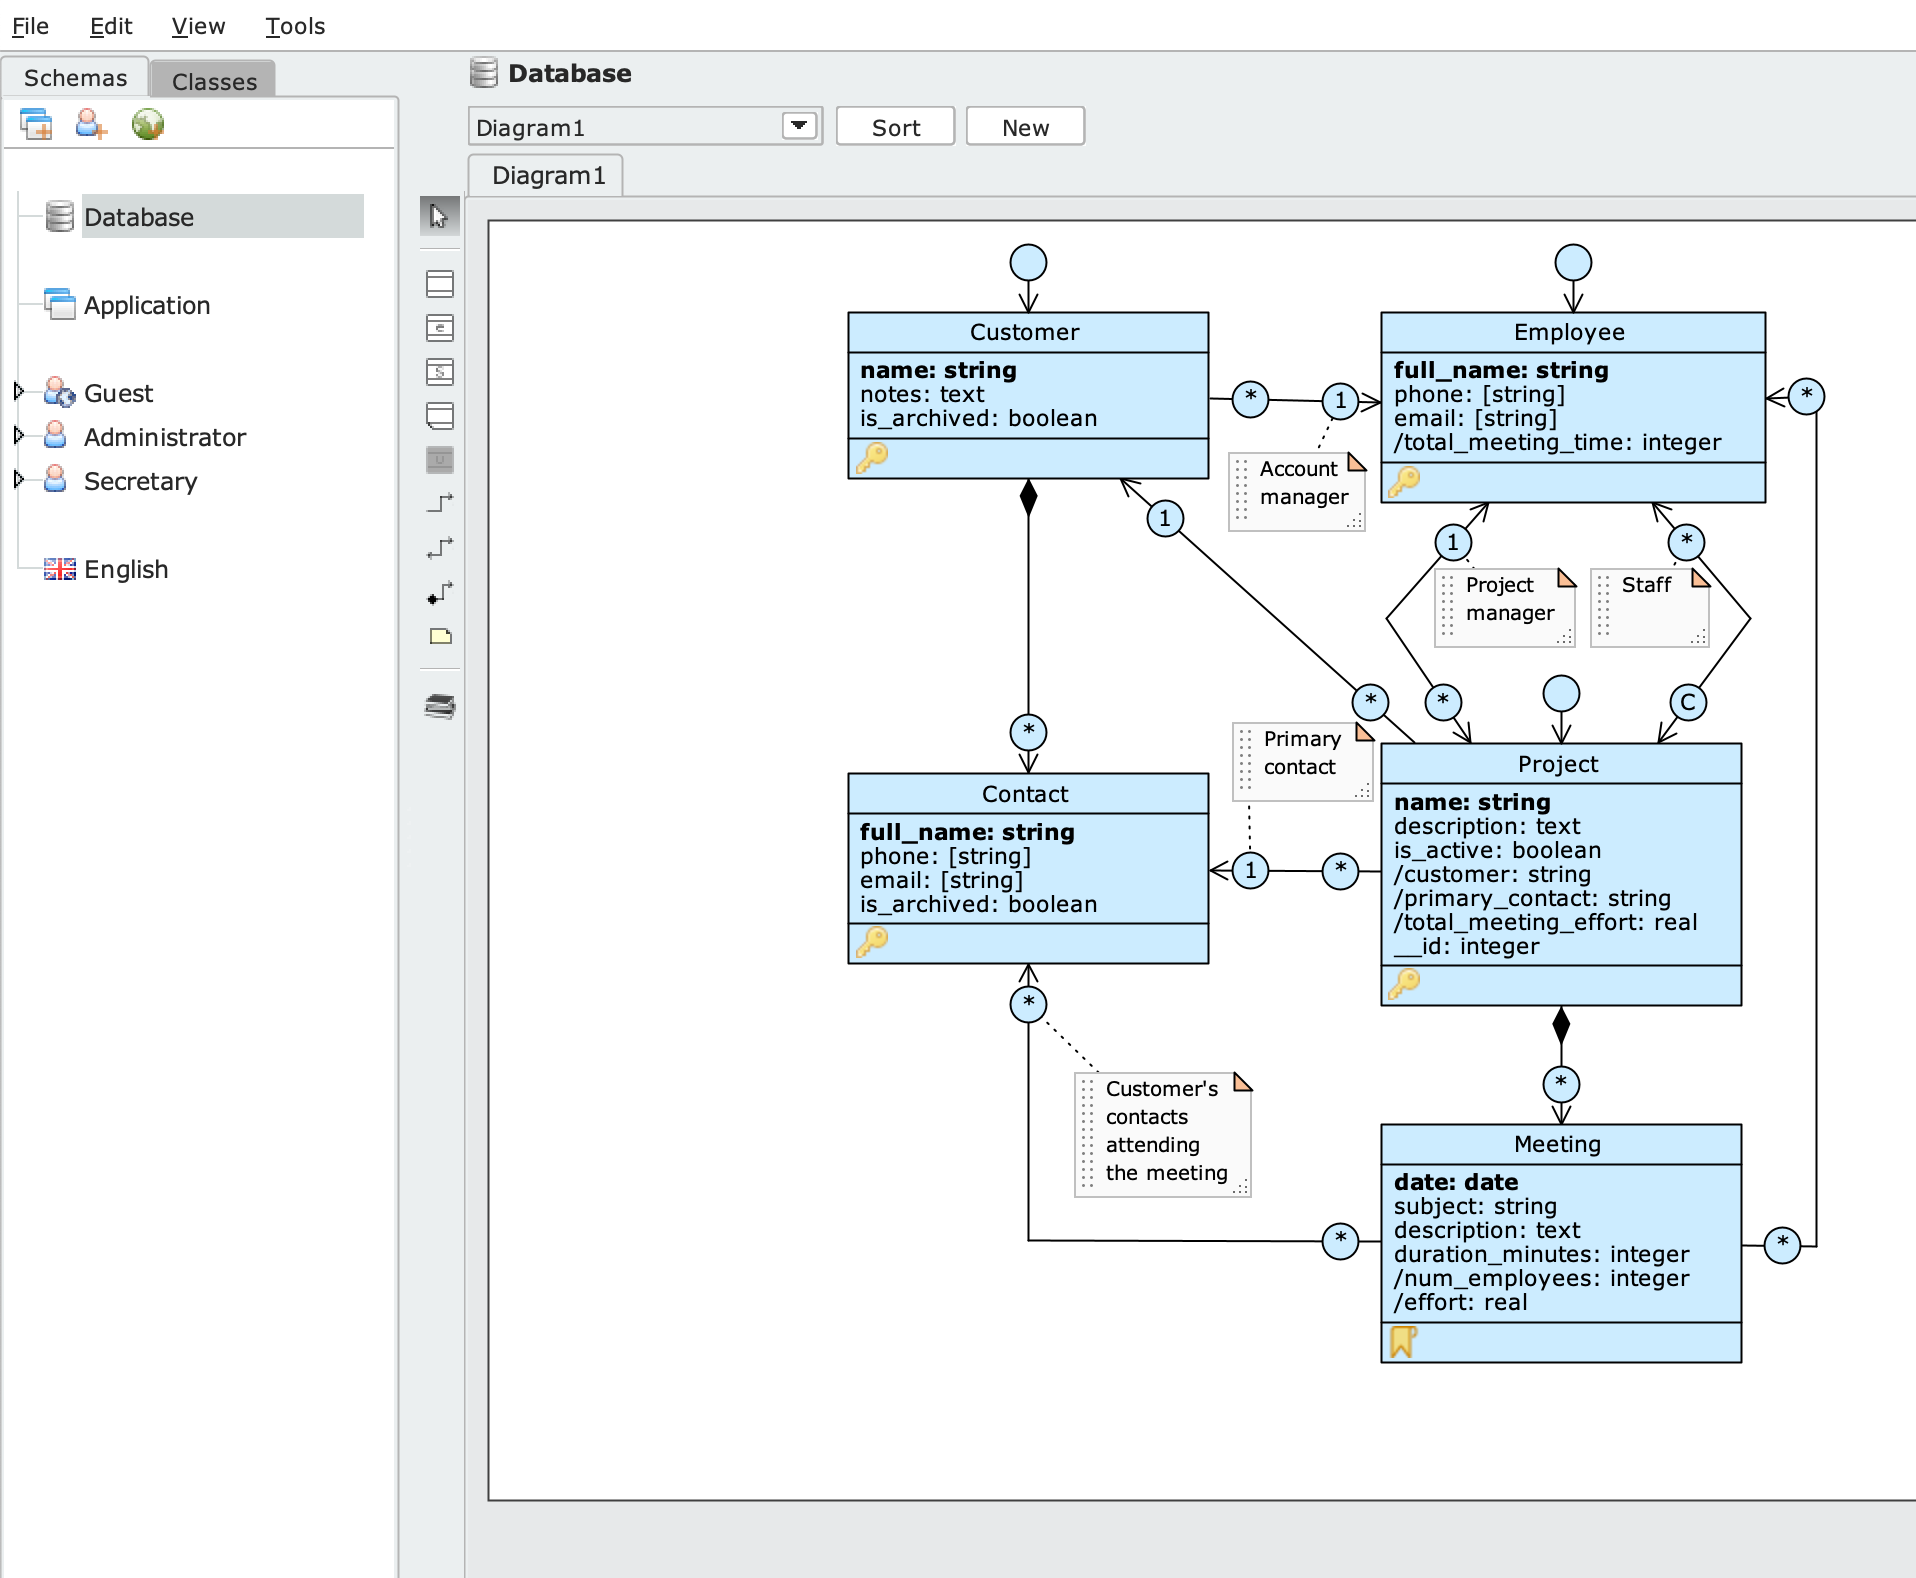
Click on the icon inside the Cloudlet panel. The Designer will pop up and show the model of the engine installed on the Cloudlet.
The engine consists of a single conceptual model drawn on three types of layers named schemas. Each schema defines a different aspect of the GraphQL engine, like a thematic layer for a geographical map.
- On the left are two tabs: Schemas and Classes; the former collects the model layers, while the latter lists the classes;
- On the right is the canvas, with a tab for each diagram and a special tab for notes.
2.4 Upload some test data to your Cloudlet #
Close the Designer and return on the Dashboard.
With an engine installed, your Cloudlet is now ready to start; in fact, an empty database with a engine-compatible structure is created automatically when the Cloudlet is started for the first time.
In order to let you perform some significant queries on the Cloudlet GraphQL API, however, we have prepared a dump of an already populated database, that you can easily upload.
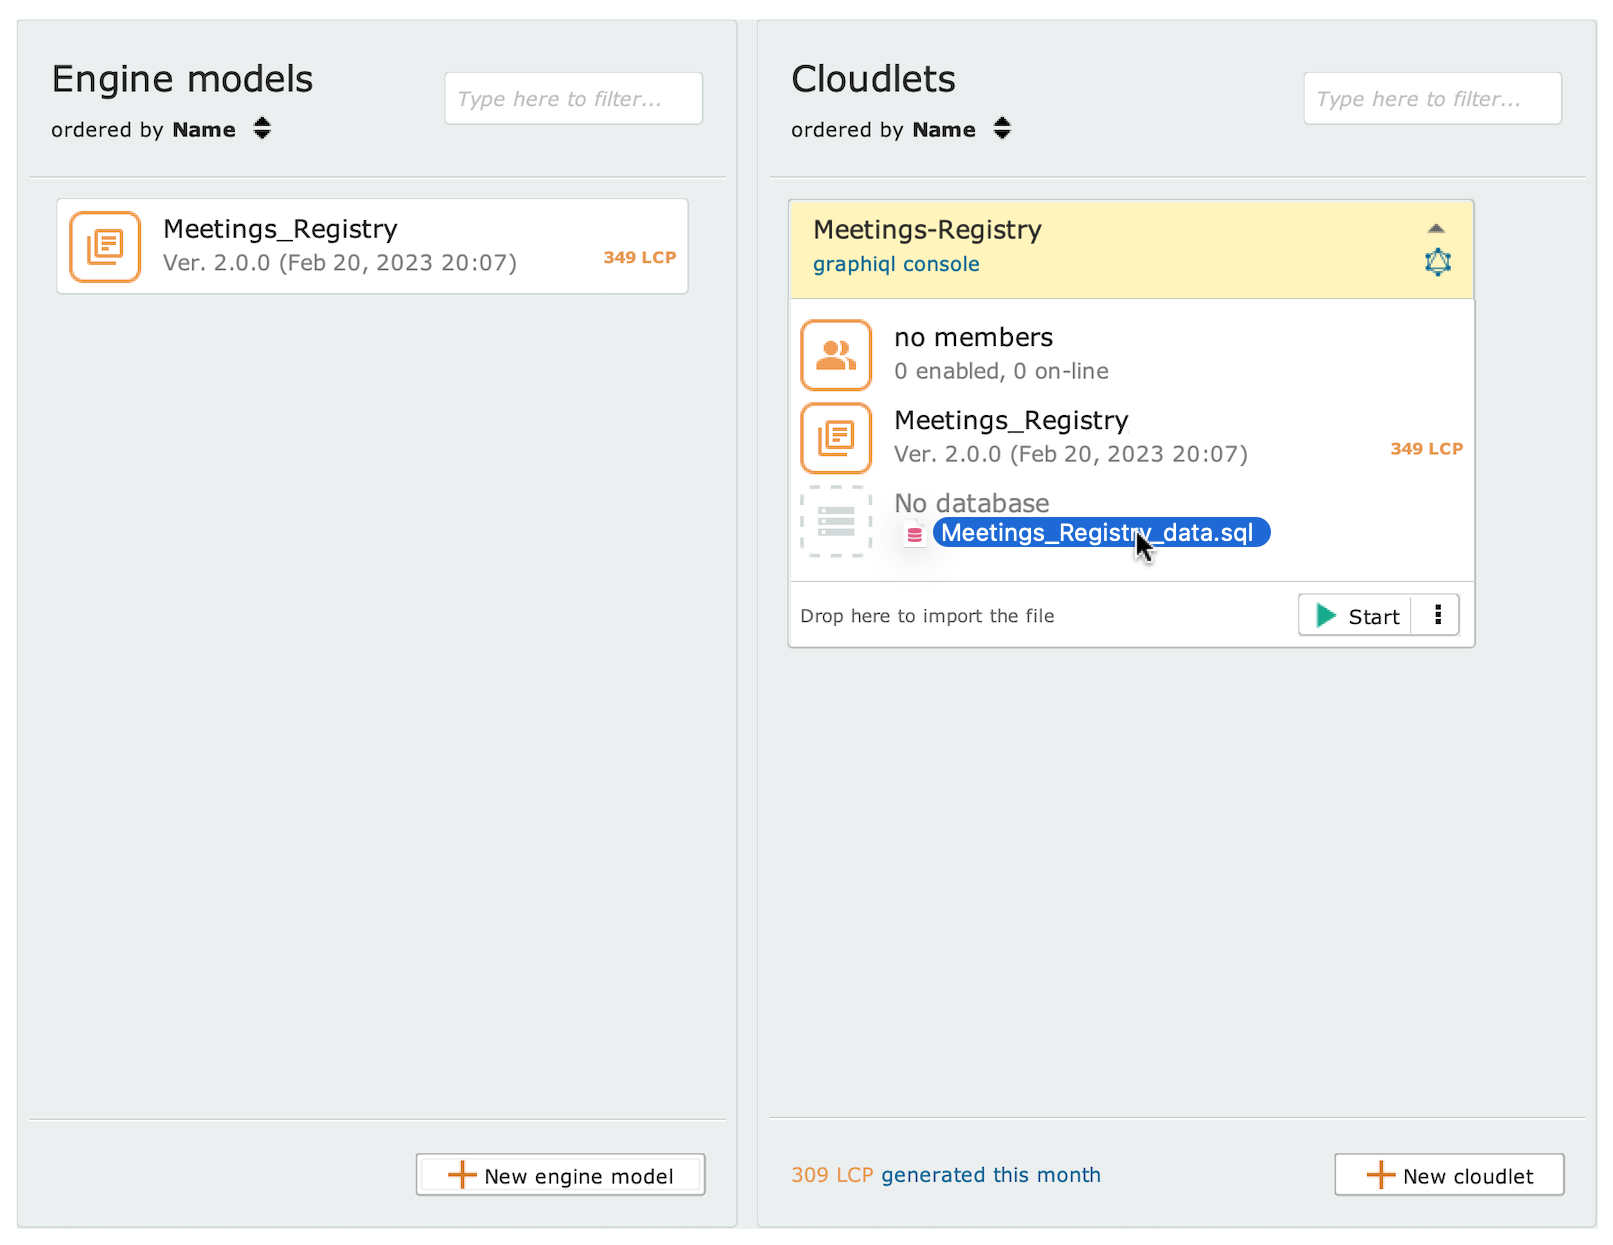
Download Meetings_registry_data.sql and drag it onto the Cloudlet panel. Once the header lights up, drop the file inside the Cloudlet panel area.
The database uploaded is automatically checked to detect any compatibility issues with engine installed. This process will take a few seconds.

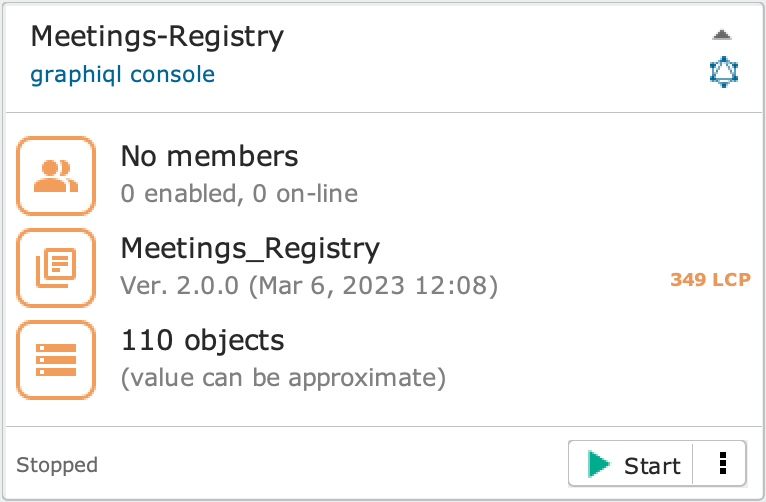
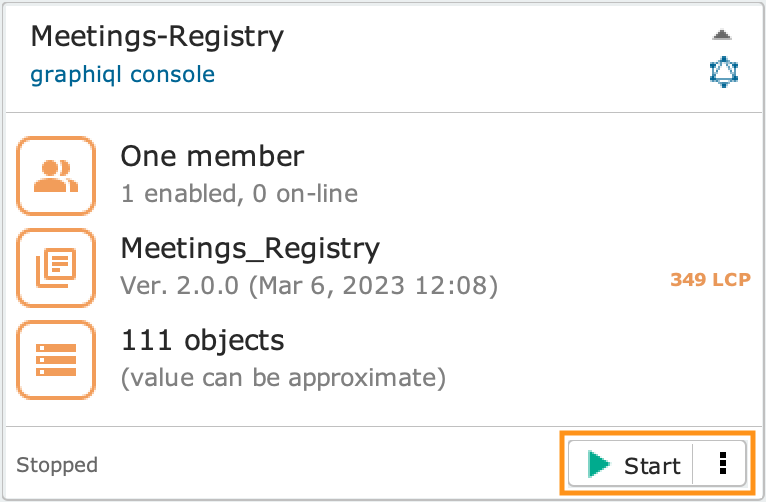
Once the upload is complete, your Cloudlet will look as shown in the image beside.
2.5 Create an end user for the Cloudlet #
In order to test the GraphQL API of your Cloudlet you need to authenticate as a valid end user.
Beside configuring the Cloudlet to connect an existing Single-Sign-On (SSO) Keycloak instance, you can also create local end user accounts, conventionally named Members of the Cloudlet, as shown in the image beside.
To create a new member for your Cloudlet, open the Members of the Cloudlet dialog by clicking on the icon in the Cloudlet panel, then click on the Create Member button.
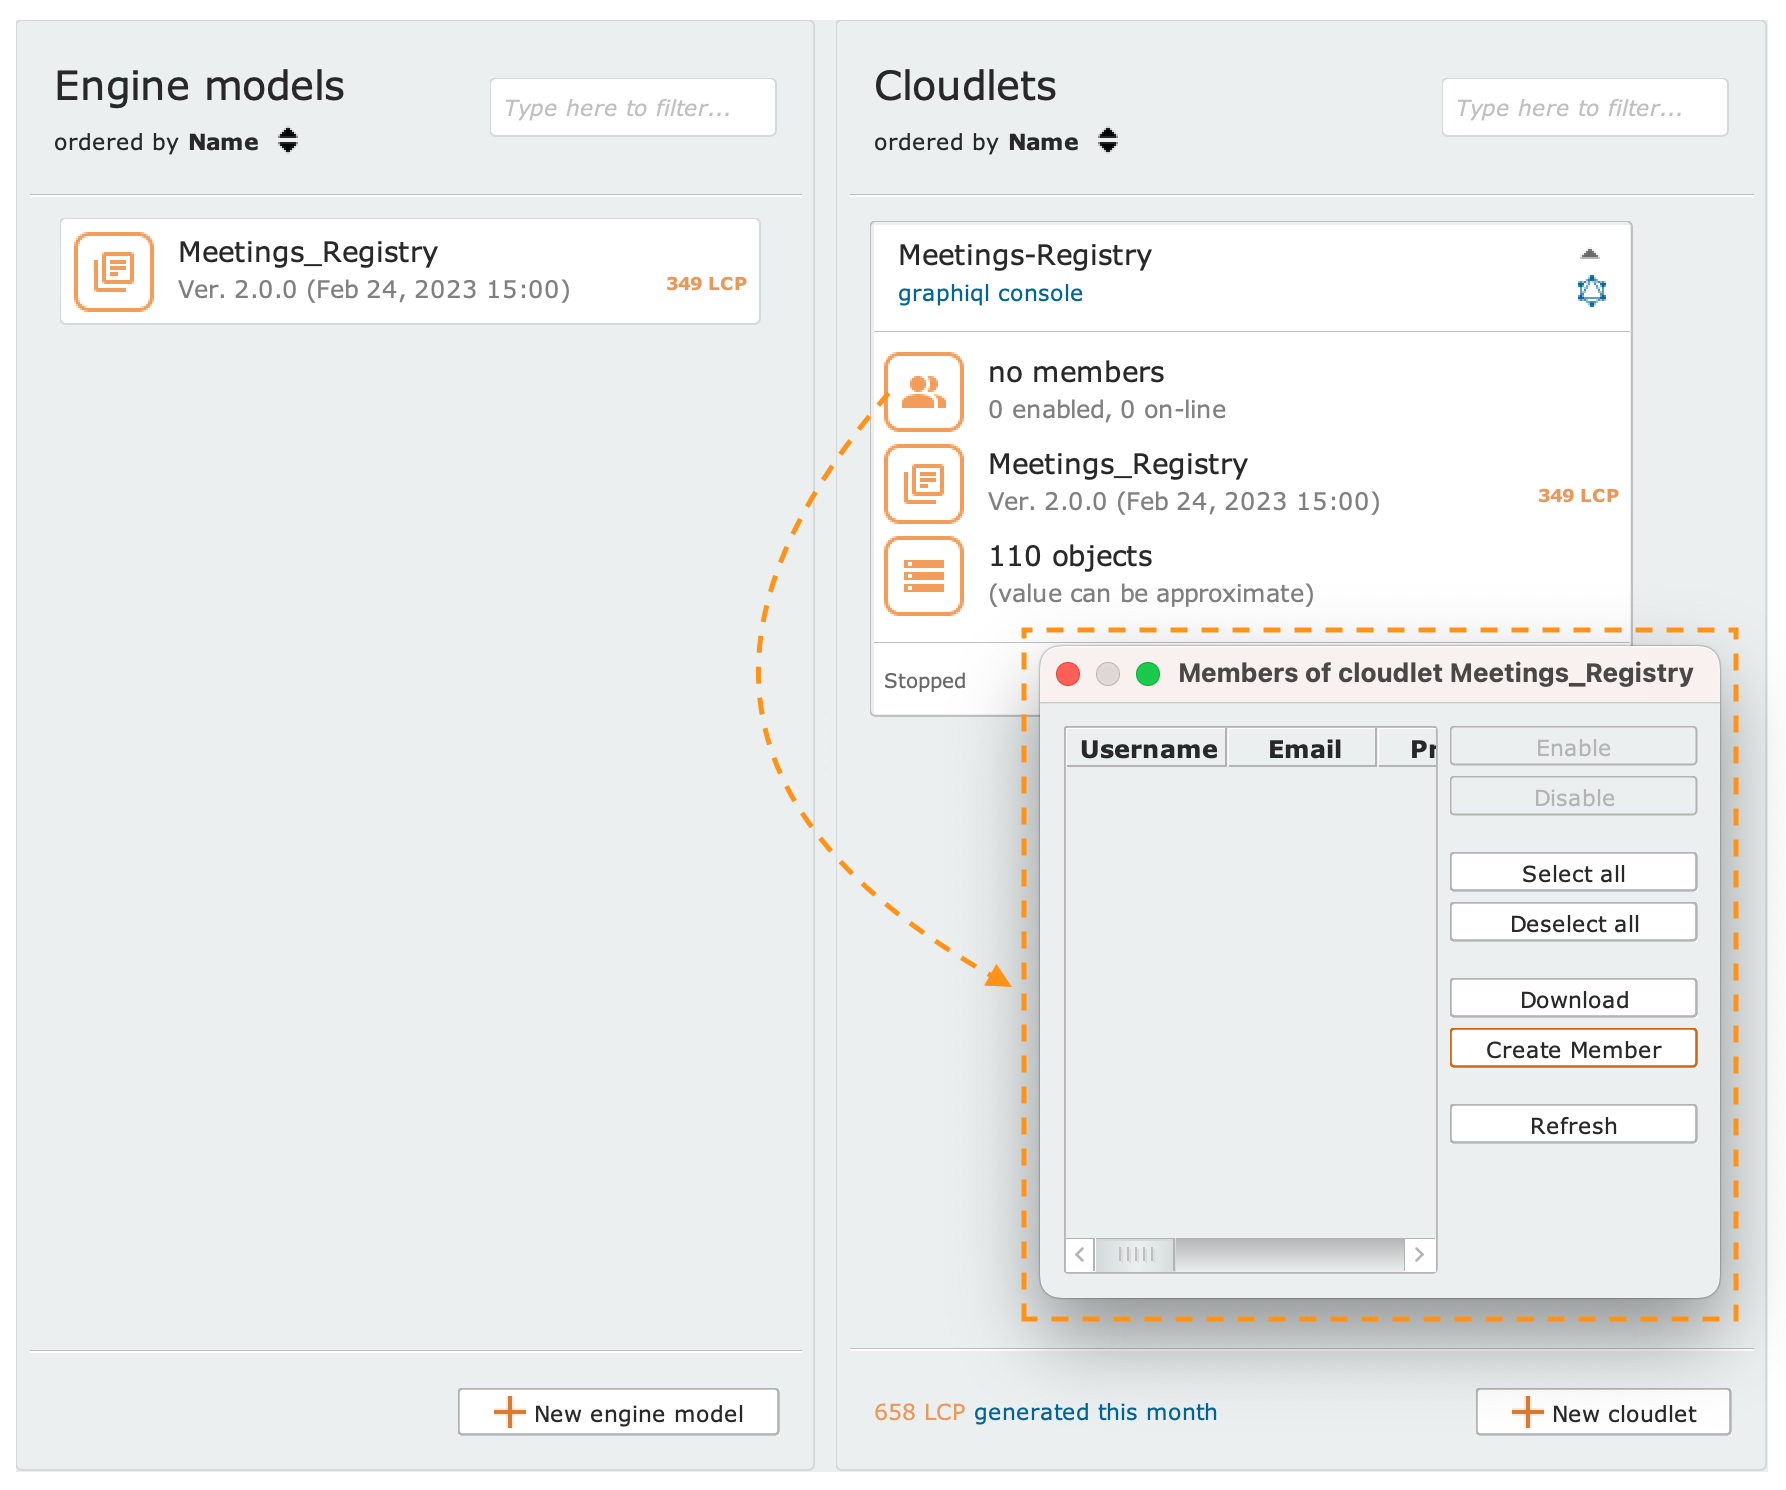
Each member has a unique username and a password (credentials) that can be used to authenticate on the Cloudlet’s GraphQL API.
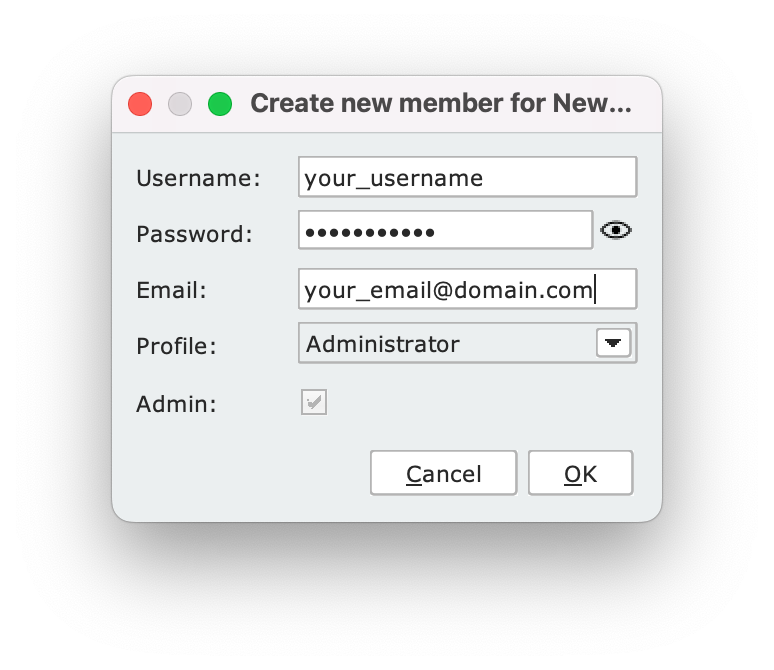
Fill in the member creation form, select Administrator from the profile dropdown menu and tick the Admin checkbox. Finally, press the OK button to confirm.
2.6 Start the Cloudlet and test its GraphQL API #
From the Dashboard, click the Start button on the Cloudlet panel.
Please wait while the Cloudlet is built and deployed. The Cloudlet panel will show a log of the operations performed during the process.

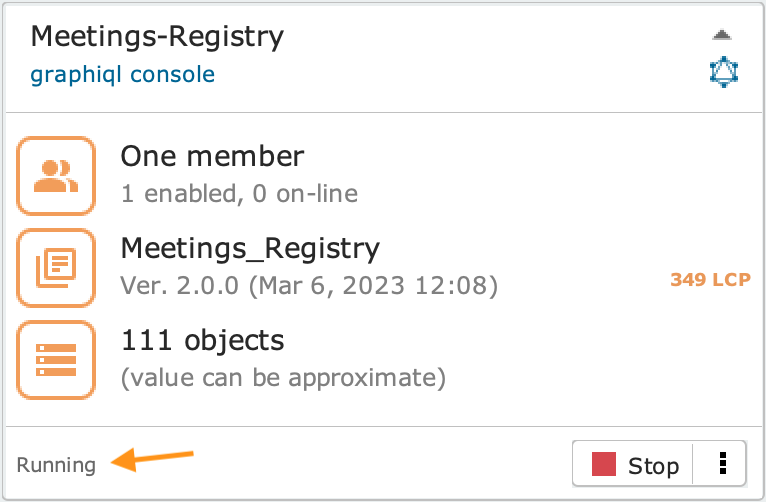
At the end of the build/deploy process, the Cloudlet will be in the Running state, as highlighted in the status line in the bottom left corner of the panel.
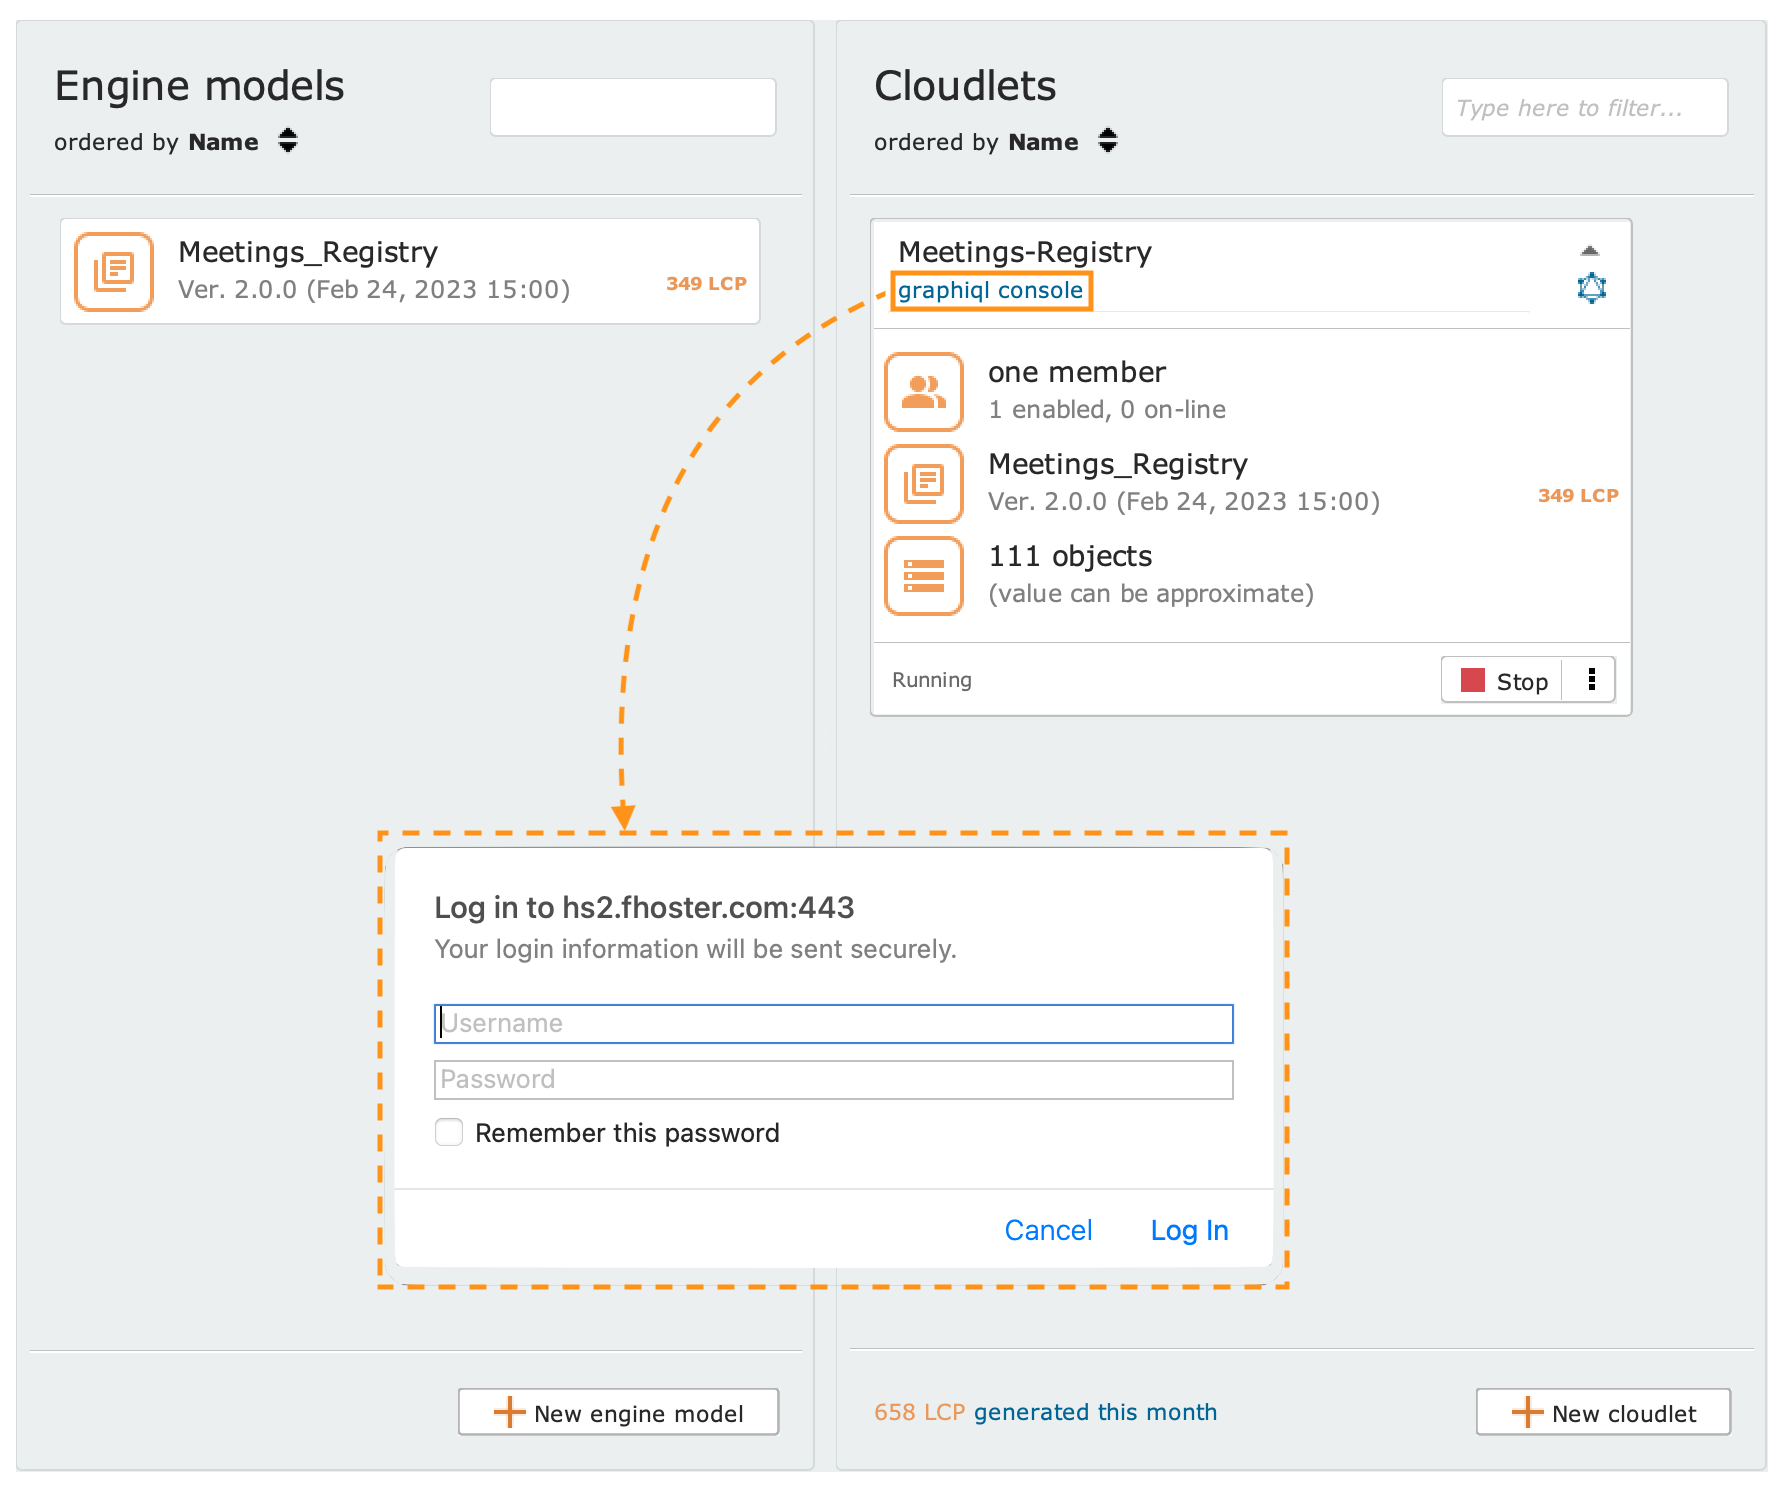
GraphiQL is a widely used open-source console for GraphQL APIs. By clicking on the URL at the top of the Cloudlet panel you can launch an instance of GraphiQL already connected to the Cloudlet, ready to execute GraphQL queries.
Authenticate using the credentials of the member created previously, and you’re all set to test the sample GraphQL query described in the following section.
To execute the sample query described below, copy the GraphQL code into the left panel of the GraphiQL console as shown in the image beside, then press the play button.
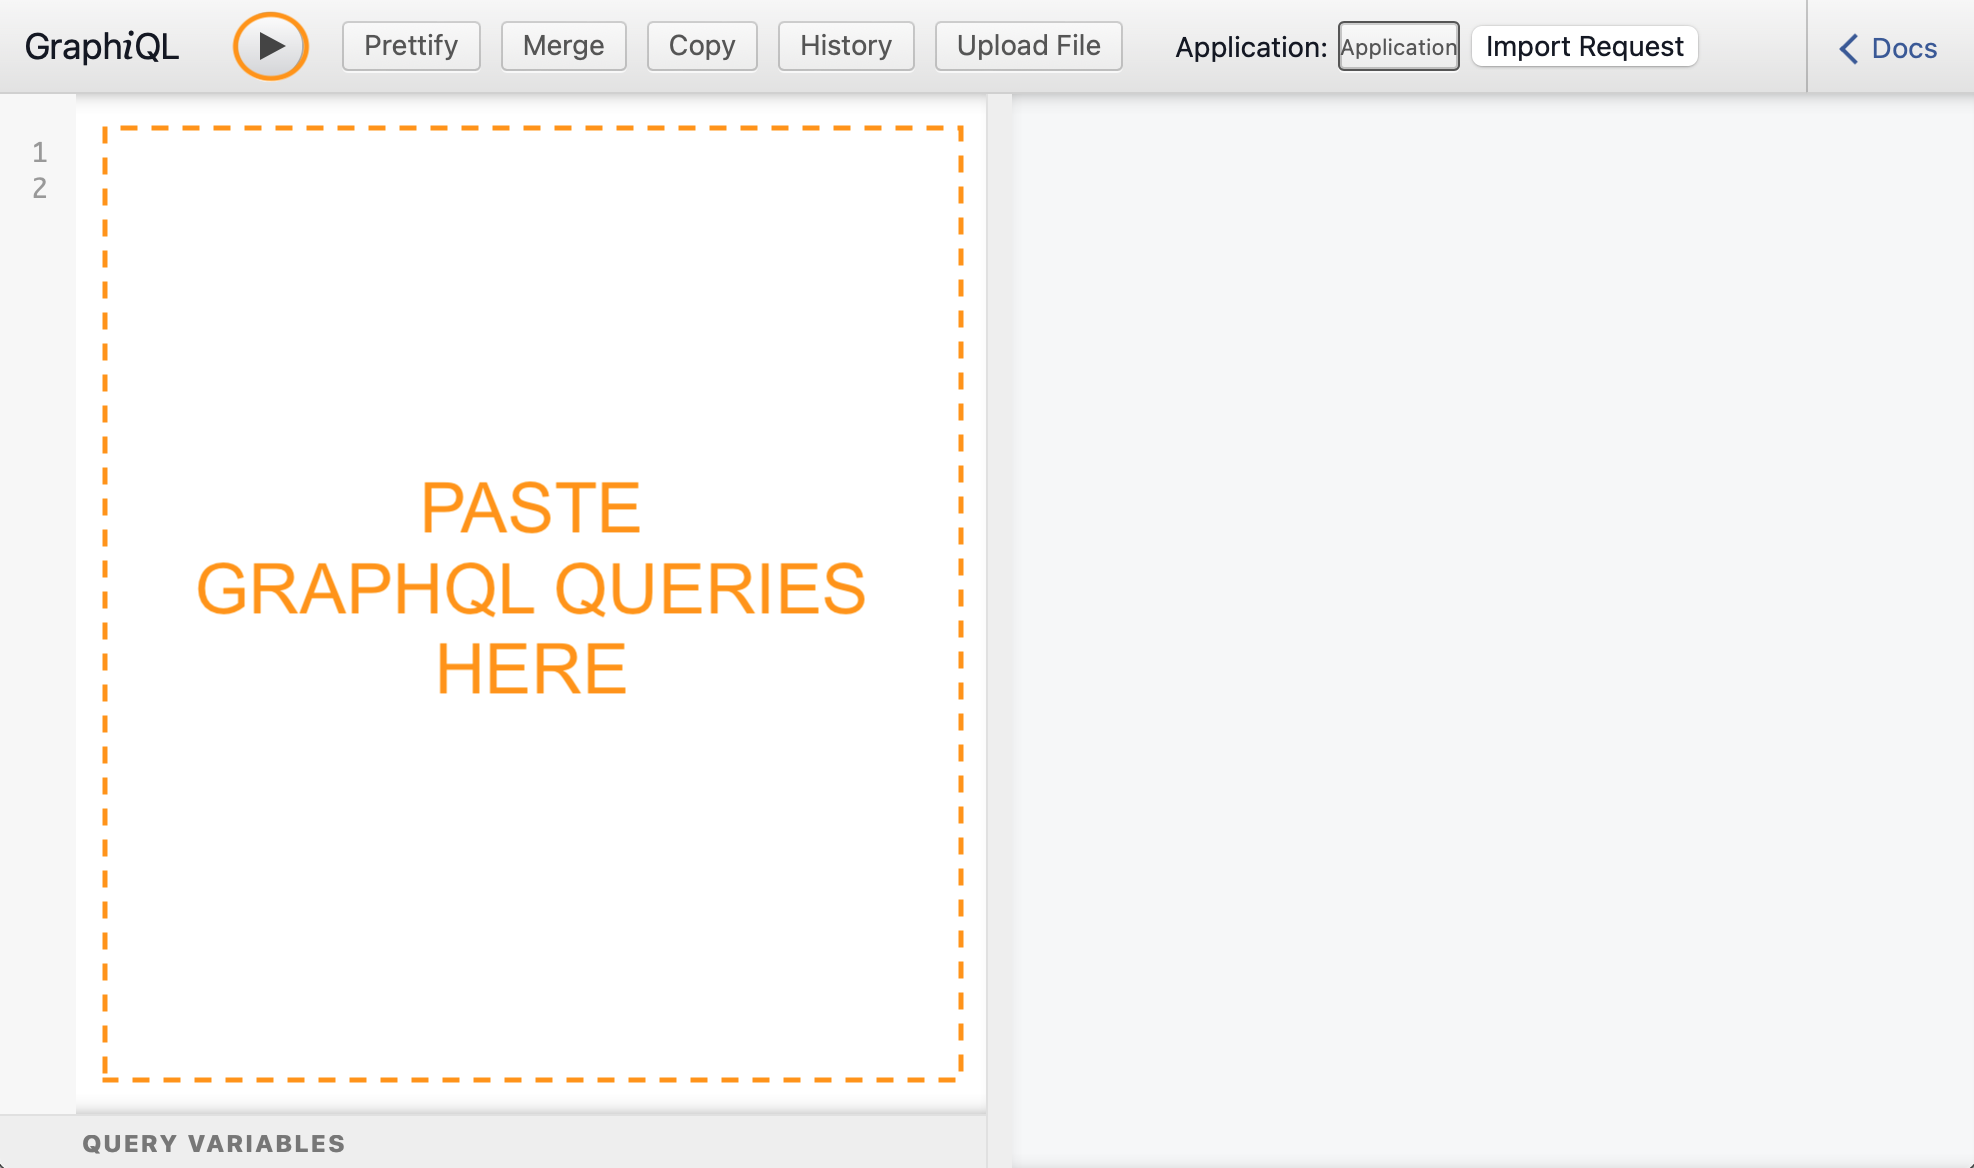
This simple query retrieves a list of all customers.
Copy the GraphQL query on the right and paste it into the GraphiQL console and press the play button at the top of the console.
query ALL_CUSTOMERS {
  Customer___getPage {
    items {
      name
    }
  }
}
3. Next steps #
Test another GraphQL query
Creating a new engine model and start modeling from scratch
To learn more about modeling with the Designer, plugin integration and the GraphQL API, see the Guides section available at the following link.
Feel free to reach out to us if you have any questions: support@livebase.com