View the community #
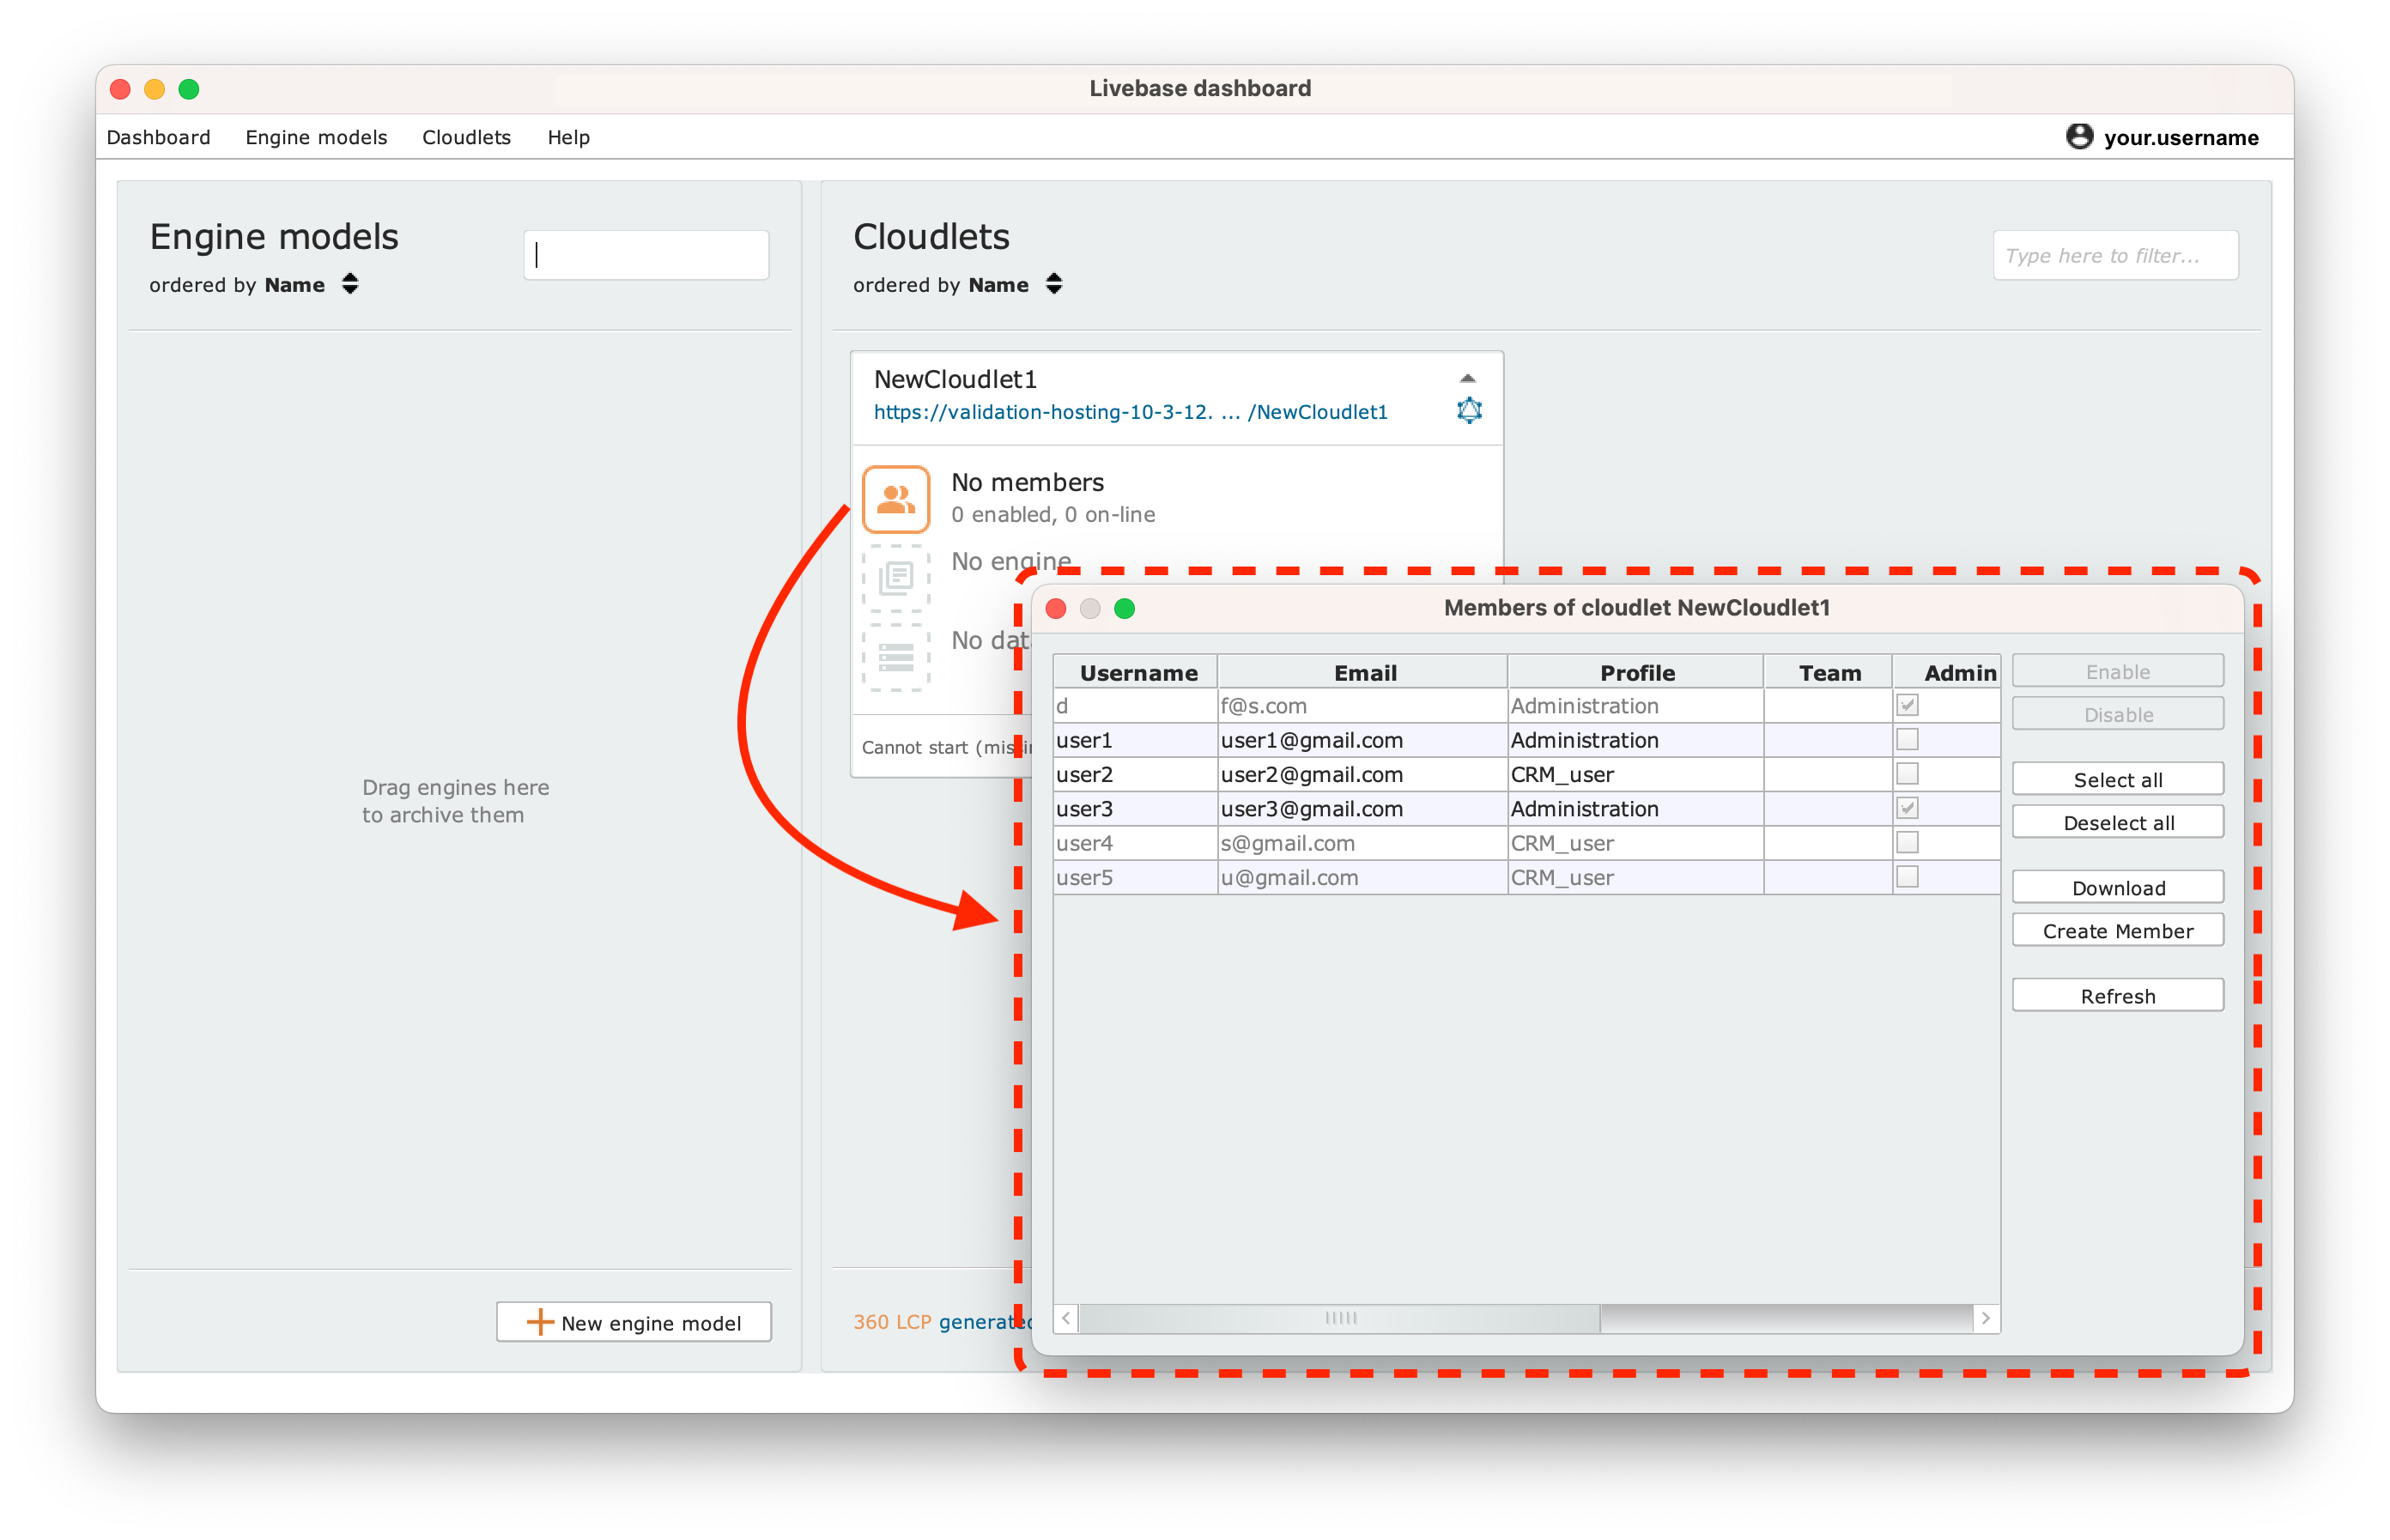
Click on the community icon to view all the members currently in the Cloudlet from the Members of Cloudlet panel, with information regarding their usernames, emails, profile, last login date, etc.
Create a member of the Cloudlet #
To access the application generated by the Cloudlet, there must be at least one member active in the community.
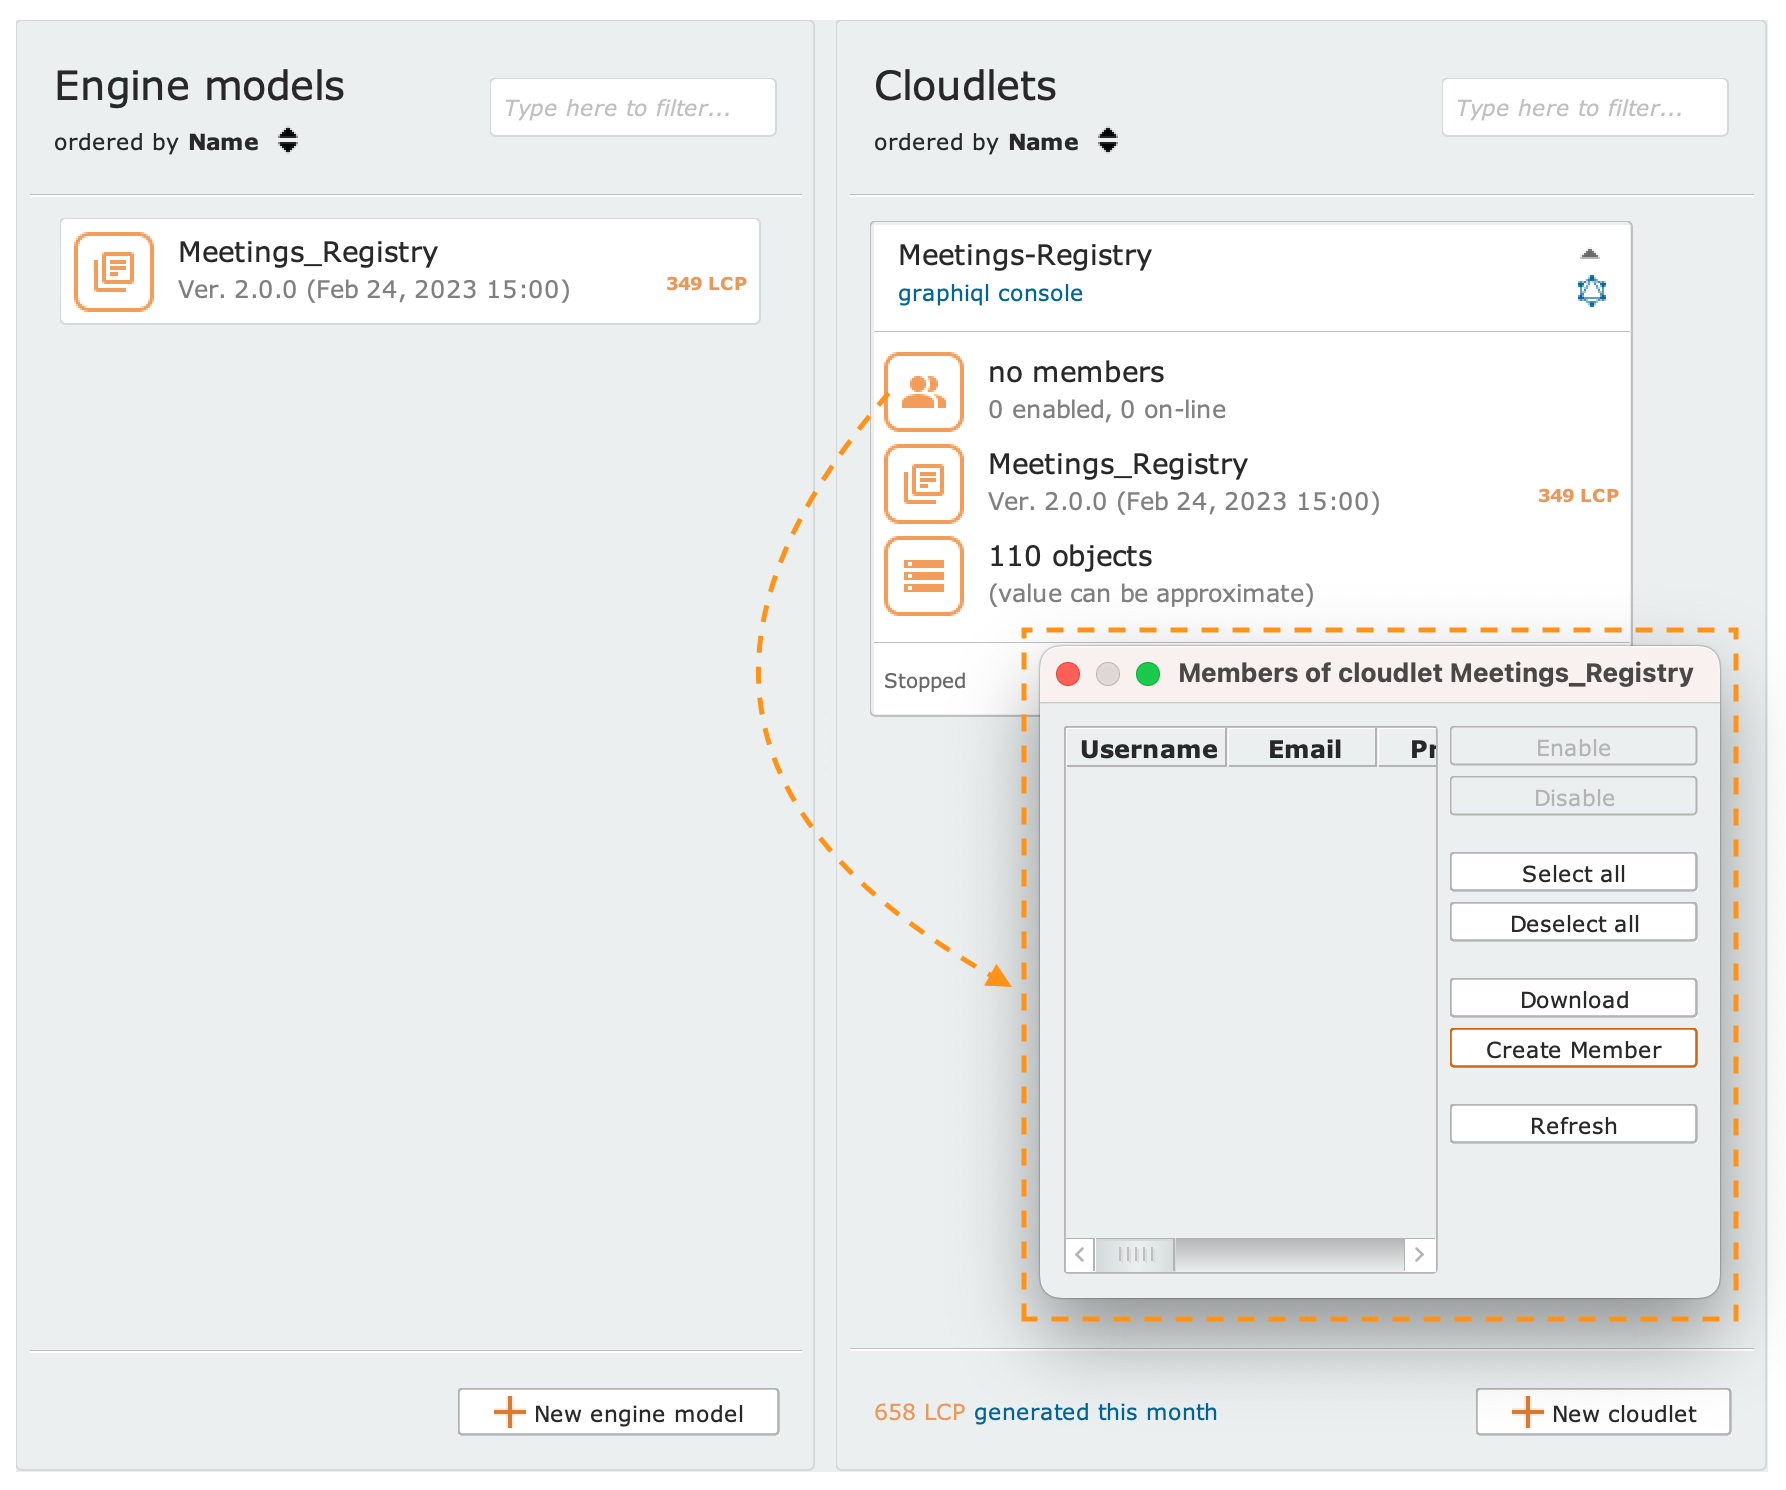
To create a Cloudlet member, open the Members of Cloudlet dialog box by clicking on the icon in the Cloudlet panel, then click on the Create Member button on the right column.
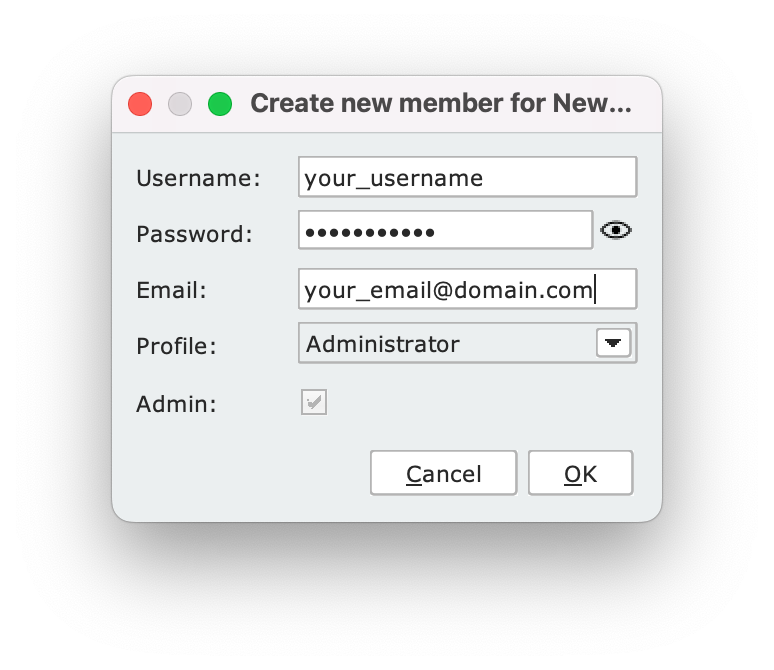
In the Create new member for [Cloudlet name] dialog box (shown in the image beside) fill out the creation form with a unique username and password. Enter also an email and associate a profile among those present (defined in the engine). Finally, choose whether or not to make the user you are creating Admin by checking the checkbox, and press the OK button to confirm.
Get the members of a Cloudlet informations in tabular format #
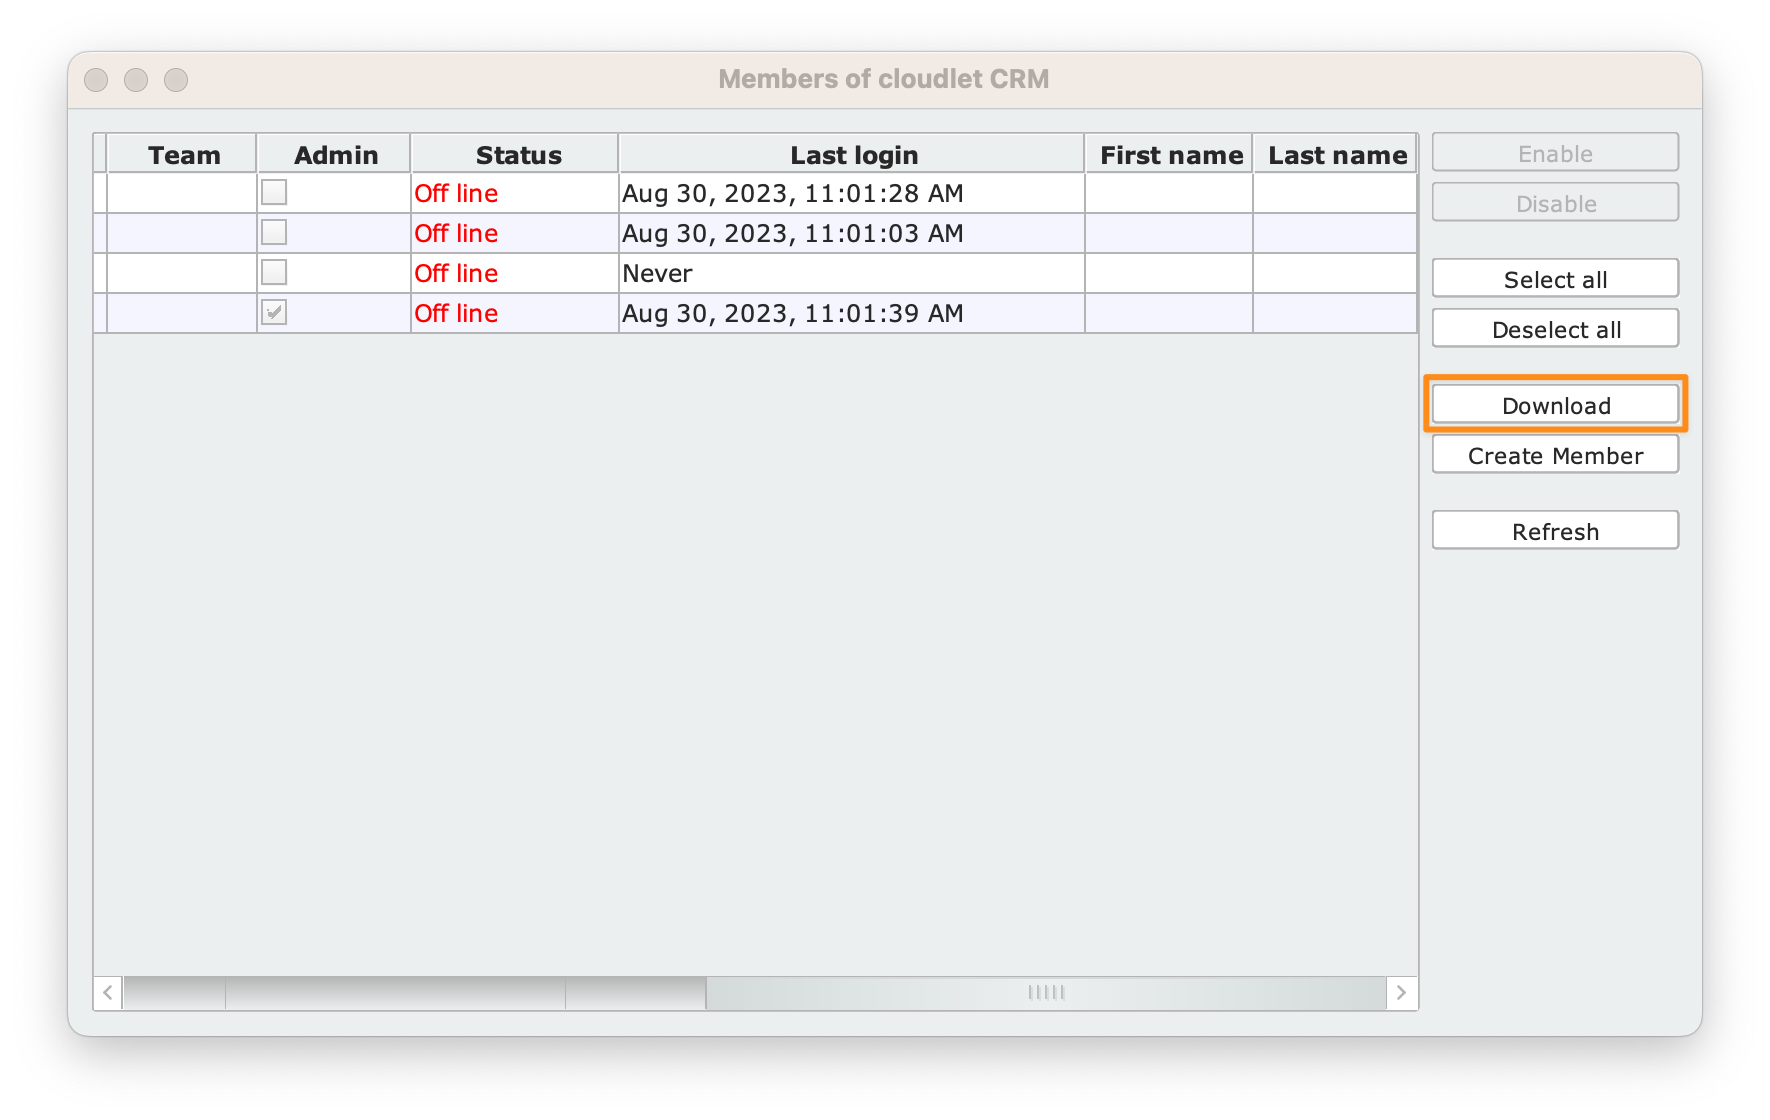
Open the Members of Cloudlet dialog box by clicking on the icon in the Cloudlet panel, then click on the Download button on the right column. By doing this you will open a panel to save the information about the community as a CSV file.
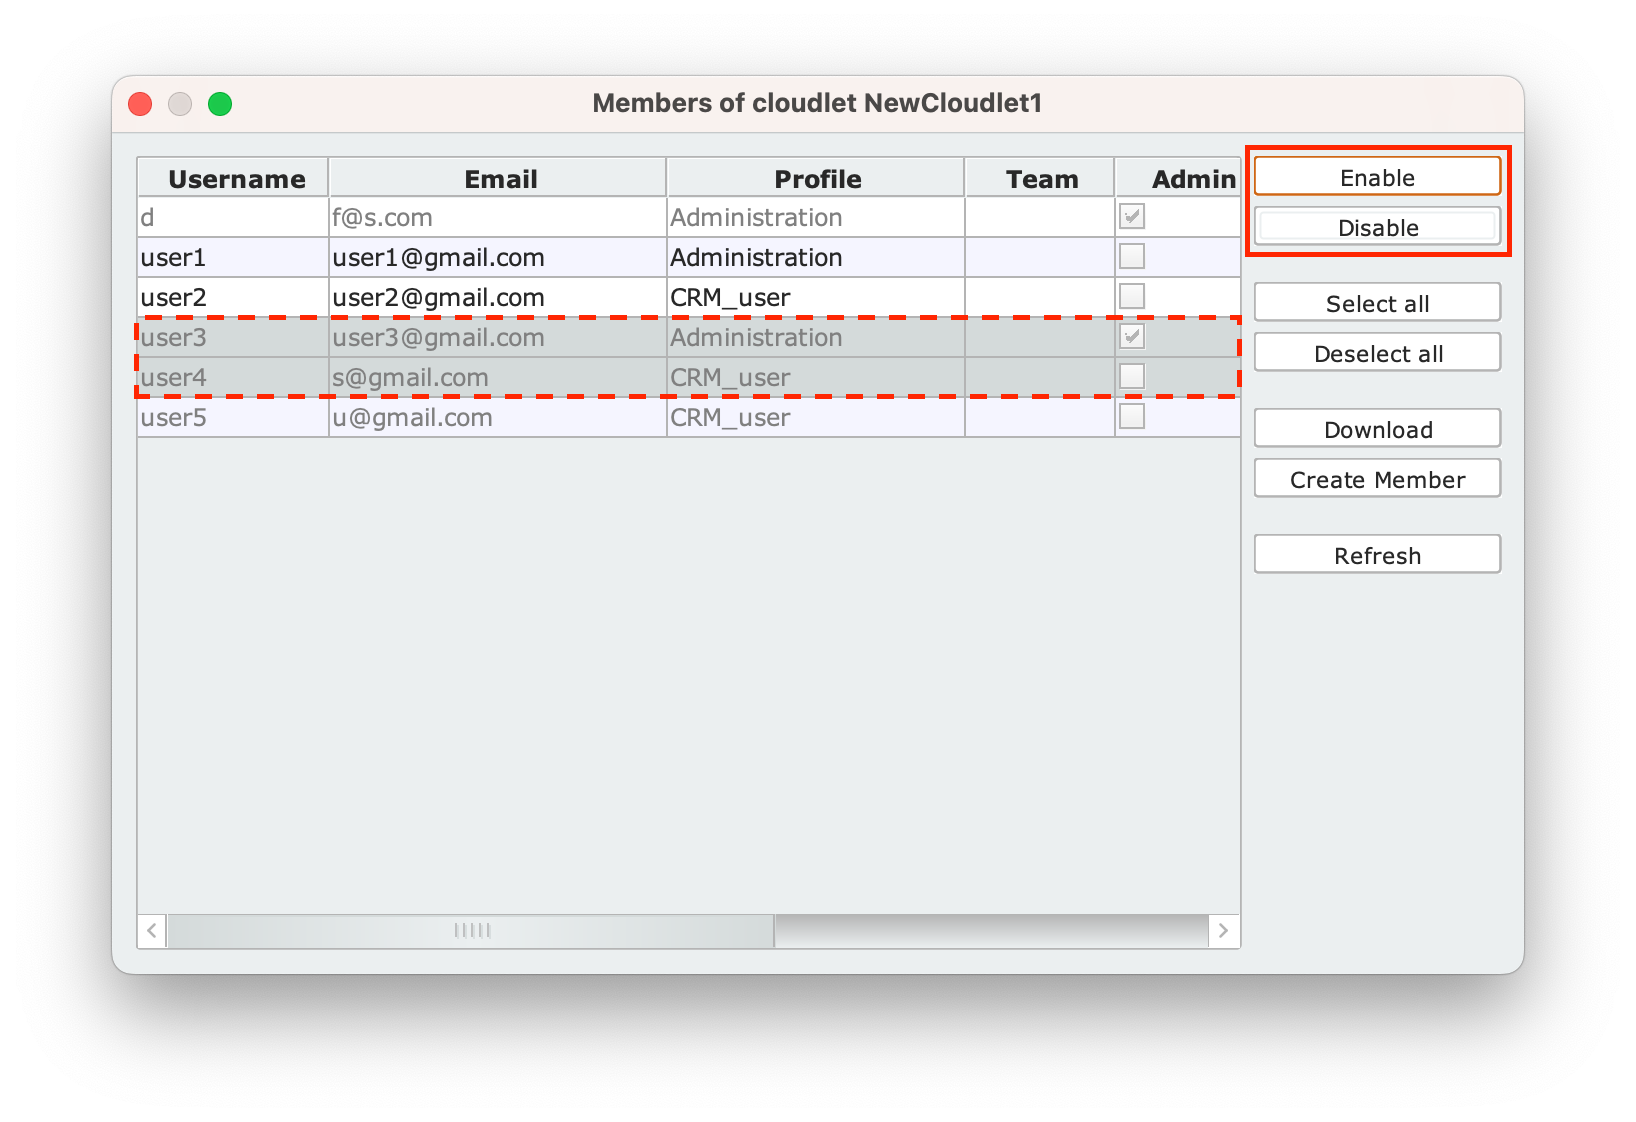
Enable/disable a member of the Cloudlet #
Open the Members of Cloudlet dialog box by clicking on the in the Cloudlet panel; from here, select one or more users and press the Enable or Disable buttons on the right column as appropriate.
Members management via REST services. #
Through the REST services exposed by the Cloudlet, it is possible to perform additional operations on the community than those executable through the Dashboard. For more information, see the dedicated page.