In almost all real-world modeling scenarios there are links between different classes of objects. It is in fact common that distinct information, that is represented on more tables, can be correlated between them. These connections happen through the relations, represented in the engine model from lines that connect pairs of classes.
In the following example we have modeled two distinguished classes: one for the employees (Employee) and one for their work team (Team). If we want to represent an employee’s membership in a team, we can connect these two classes with a relationship. This allows us to match the objects of one class to the objects of the other: the choice of the employee’s team will therefore be made by selecting one of the objects present in the Team class.
An example of a relationship
Relationship types #
Livebase supports two relationship types:
- Association: a common relationship between two classes of equal importance;
- Composition: a stronger type of relationship, in which one class is considered part of the other.
Roles #
Each of the classes that participate in a relation assumes a role, which clarifies the meaning of the relation itself. In the engine model, roles are depicted with circles placed at the ends of the relationship.
By default, the name of the role is the name of the class to which the relation points, followed by the suffix _. You can view the role name by hovering the cursor over it.
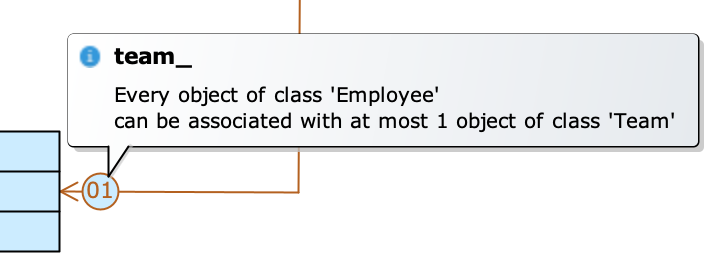
When a role is selected in the diagram, the class to which the role belongs is also highlighted. This class is called parent for that role (in some cases it is also called source class), while the class represented by that role is called target. It can be useful to imagine a role as a special attribute of the parent class, whose value is an object (or set of objects) of the target class (Employee.team_ has an object of Team as its value).

The team_ role has been selected, highlighting the parent class Employee
Create a role #
Creating a role depends on the type of relationship you want to model. For more information, see the Associations and Compositions pages.
Rename a role #
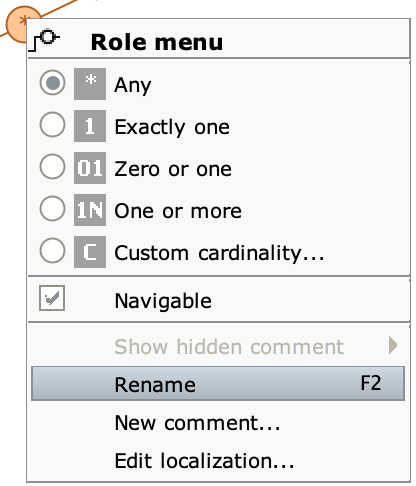
Select the role you want to rename and right click to open its Role menu. From the drop-down menu choose Rename or press F2.
Alternatively, double-click on the role you want to rename.
Example #
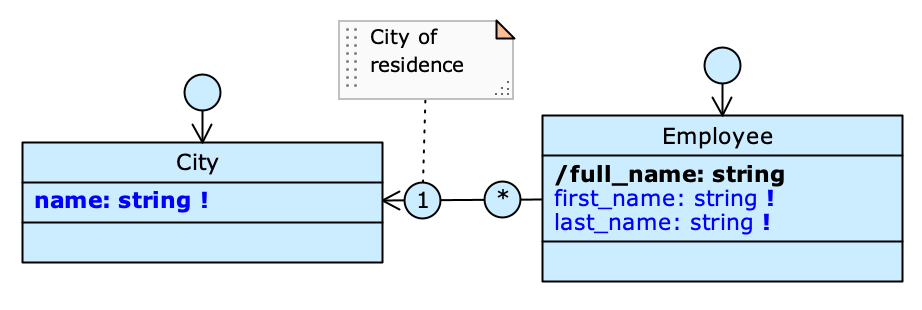
In the engine model shown in the figure two classes are modeled: one for the employees (Employee) and one for the cities (City). We have connected these two classes with a relation, so as to be able to store the the employee’s residence in one of the cities persisted in the database.
The role names of the relation chosen by default by the Designer are employee_ and city_ respectively. To make the latter more explanatory, we renamed it city_of_residence_.
Next, we wanted to represent the employees’ city of birth as well. Reusing the same classes, we created a second relation, renaming the role with City as its target as city_of_birth.

Multiplicity #
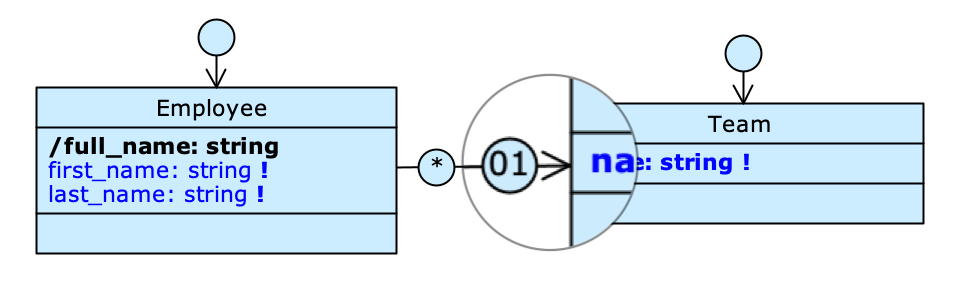
The multiplicity of a role determines the number of objects of a target class that you can associate with the source class. In the Designer it is represented by the number or character written inside the role. By hovering the mouse over a role, a tooltip appears, explaining the meaning of its multiplicity.
These are the available multiplicities:
- Any (
*): any number of objects can be associated, even none; - Exactly one (
1): one and only one object must be associated; - Zero or one (
01): at most one object may be associated; - One or more (
1N): at least one object must be associated; - Custom cardinality (
C): a number of objects within a custom range must be associated.
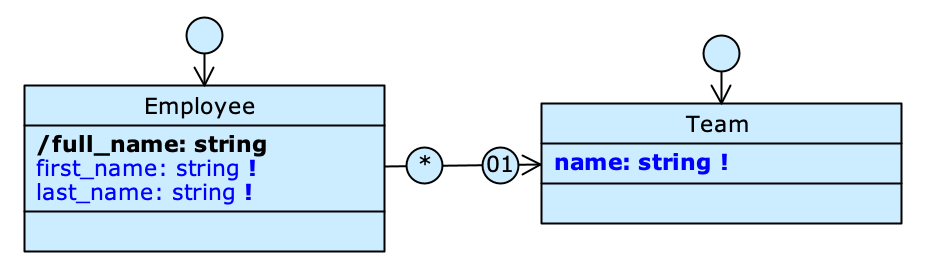
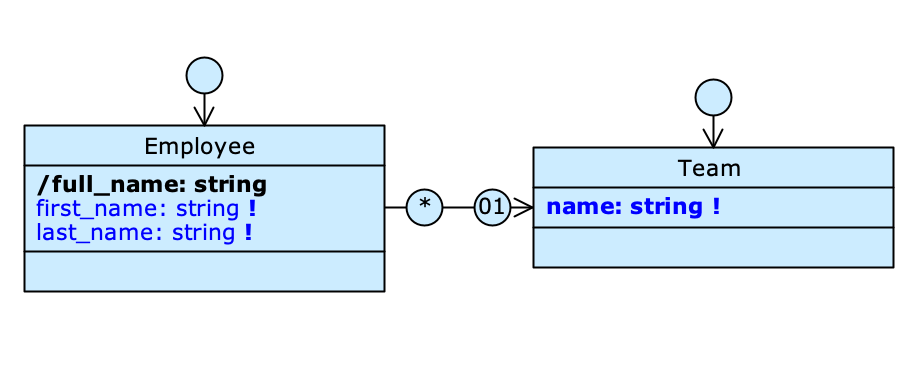
An example of relationship
Looking at the example shown in the figure, we can see that the two roles of the relationship between Employee and Team have different multiplicities. Let’s look at their significance:
- the role on the side of Employee has multiplicity Any (
*): each team can therefore have any number of members (even none). - the role on the side of Team has multiplicity Zero or one (
01): an employee can join at most one team, but the association is not mandatory.
Modify multiplicity #
Select the role whose multiplicity you want to edit and right-click to open its Role menu. From the drop-down menu choose the desired multiplicity.
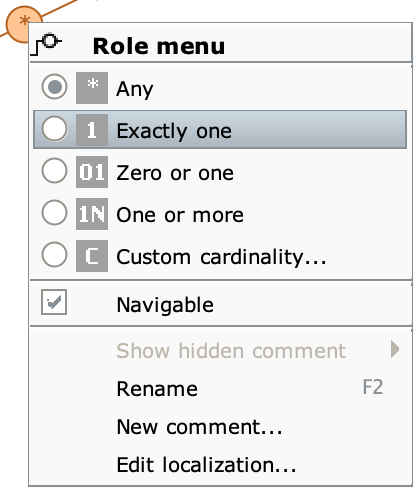
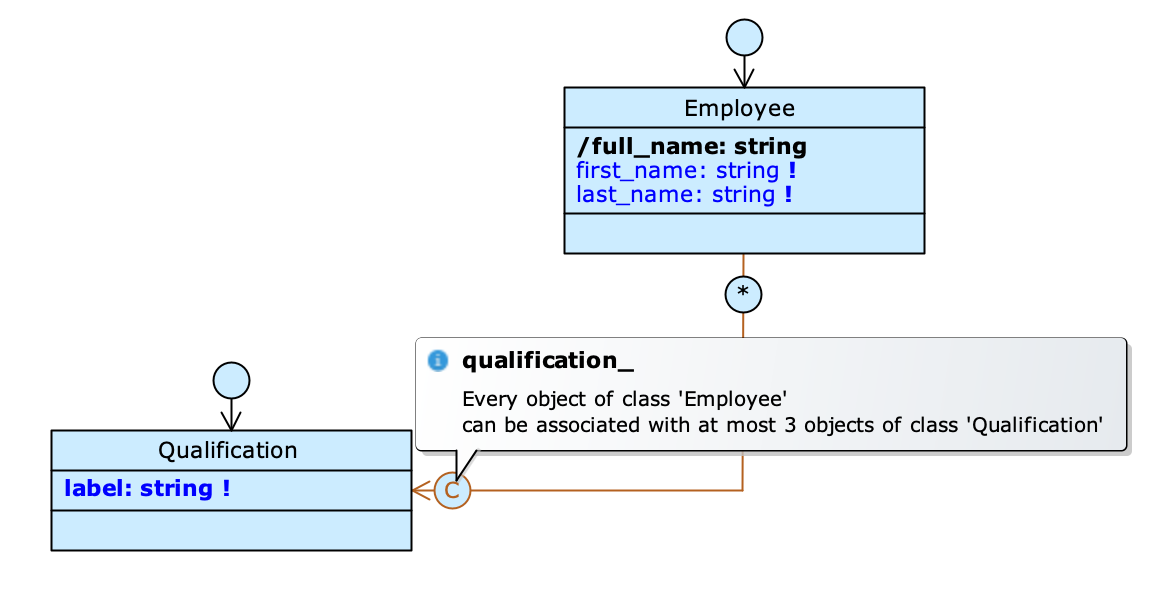
Choosing Custom cardinality... opens the Cardinality Editor, from where you can customize values for minimum and maximum multiplicity.
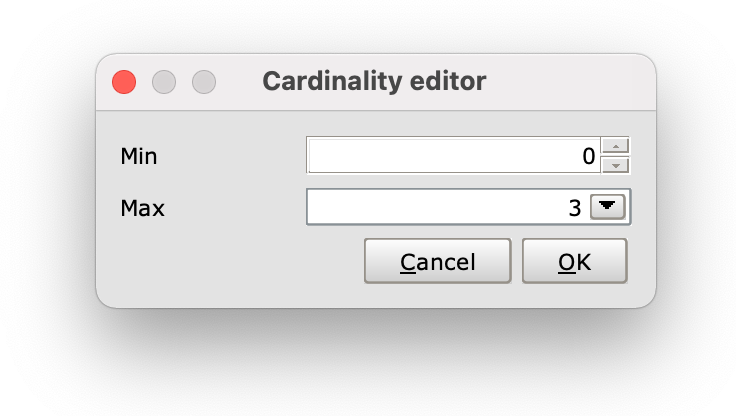
In the example, we imposed a limit of 3 qualifications per employee. We have therefore inserted a custom multiplicity (C) for the role pointing to Qualification.
Navigability #
Navigability determines the direction of the relationship; in the engine model, it is represented by an arrow near a reachable role. The presence of the arrow indicates that objects of the class placed at this end of the relationship can be reached by the class present at the opposite end.
Since Livebase only supports binary relationships (involving two classes), navigability can only be of two types, unidirectional or bidirectional. Each relation must be navigable in at least one direction.
Unidirectional relationship
Bidirectional relationship
Change direction of navigability #
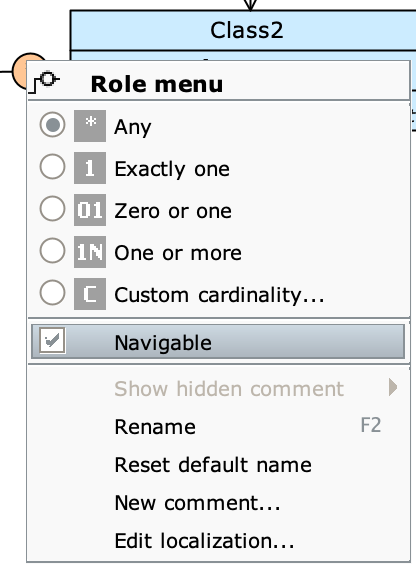
Select the role pointing in the direction you want to change navigability and right click to open its Role menu. From the drop-down menu, check the Navigable option to make the association navigable in that direction.
To do the opposite, remove the checkmark to make the association navigable in the opposite direction only.